


Kick drum can be considered as the main elements that can make your song to come to life. As a music producer myself, I do not want to have a great track consisting of uplifting melody with a sloppy kick drum that can make the song lifeless. The kick drum needs to be tight with enough low end for bass section and enough mid/high end to let it to cut through the mix. Here are a few processing tips that you can apply on your kick drum to make it tighter.
1. EQ for Kick Drums
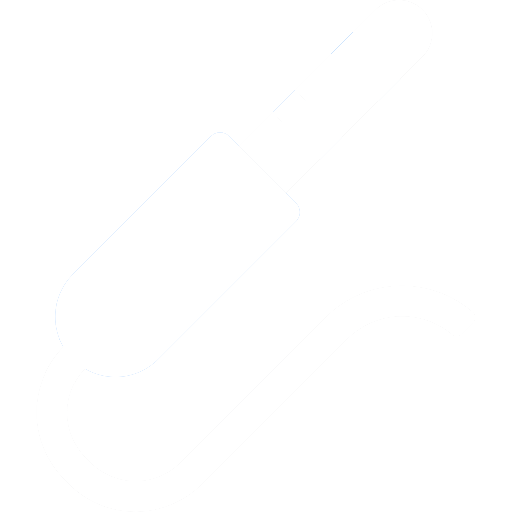
The first thing that I’ll have in mind when I want to mix my kick drum is to remove the frequency that I don’t want. Unnecessary frequency can prevent you from getting the most out of your kick drum without you noticing it. I usually have a low cut (high pass) around 25 Hz to 40 Hz and a high cut (low pass) around 16000 Hz to 20000 Hz depending on the kick itself.
Fabfilter Pro-Q 2 is a great plugin for this as you can type in any frequency that you want and it offers different types of slopes for your cuts as well.
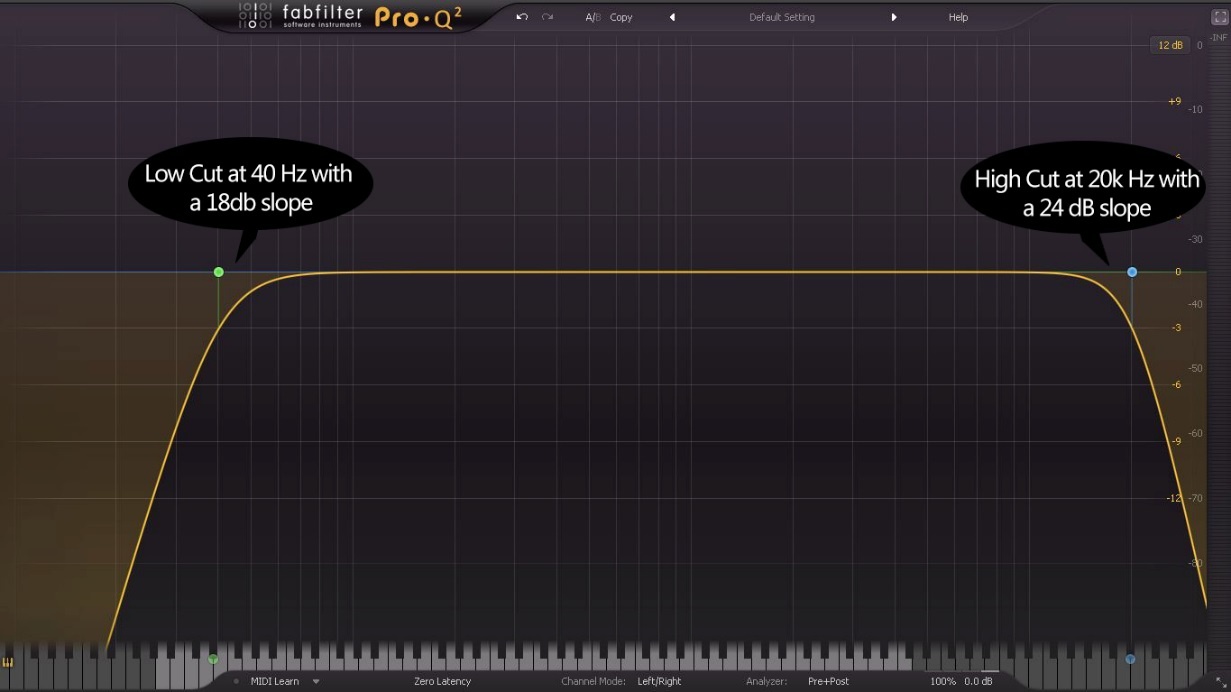
After that, I will take it to the compressor and take care of the dynamics. I’ll be discussing this topic down below so make sure to finish reading this blog. After compressing the kick, it’s time to boost and decrease certain frequency for the crispiness of the kick. I usually will have a boost at root frequency of the kick and at frequency around 100Hz to 200 Hz for it to pump through laptop speakers. Then, I’ll decrease frequency around 200Hz to 400Hz for around 5dB as it’s usually where the muddy frequency is.
For an example, if a kick has a root key of F, I’ll boost around 43 Hz.
These are not the rules to EQ your kick drum. Feel free to explore your kick drum and use your ears to determine certain frequency that you don’t want or that will make your kick sounds muddy.
2. Compression for Kick Drum
As the kick drum contains the most sub content in your drums, I often compress it heavier compared to any other drums in the mix so that it can make us easier to achieve a louder track after the mastering stage.
I usually compress the kick drum by 2dB to 6dB with a ratio of 4:1. To preserve the transient of kick, I usually have an attack time of 3ms to 20ms depending on the length of ‘click’ transient of the kick so that it can pass through the compression process.
For the tail of the kick, each kick drum has its own length therefore the you should play around with the release time of the compression to find out what sounds best on your kick drum. Do make sure that the release is too long that the compression should be back at 0dB before another kick drum comes in.

3. Stereo Image of Kick Drum
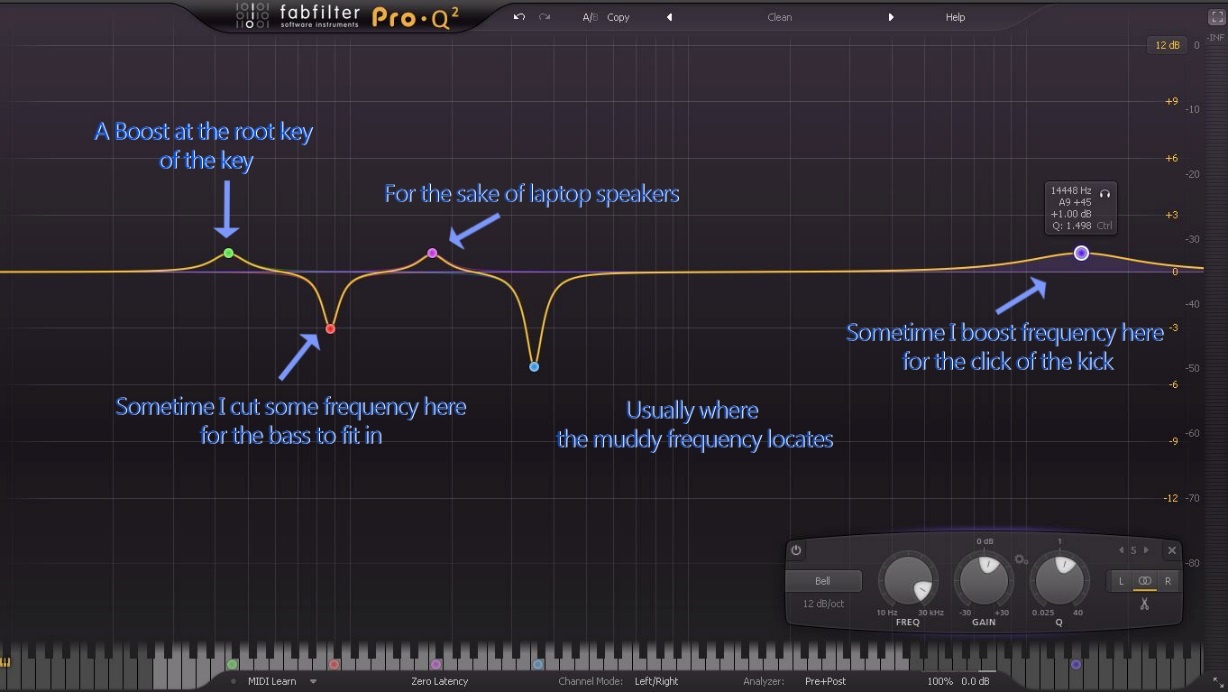
All kick drums have to mono in the mix to ensure that there are no phase issues in your mix. You can make your kick mono in so many ways but my most favourite way of doing it is by using Izotope Ozone 5 Imager. With Izotope Ozone 5 Imager, you can check your kick drum whether if it’s mono or not and if it’s not, you can simply make it mono by clicking the box next to the ‘mono’ word. It should be a straight line in the vectorscope if your kick is in mono.
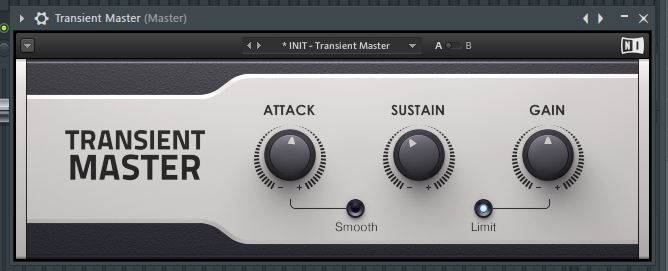
4. Transient Shaper
Sometime when you feel that your kick drum does not have enough ‘click’ or it does not sound tight in its tail, transient shaper plugins are there for the rescue.
I like to use the Transient Master plugin for this process. Just simply play with the 2 knobs there, Attack and Release, to achieve the sound that you want in your kick drum.
Increase the attack when the ‘click’ of your kick drum is not enough for you. Decrease the release to make your kick drum tighter but do not overdo it.
5. Parallel Processing
Parallel processing is defined as the simplest and most direct way is to chain a series of effects to interrupt the dry sound of an audio or software instrument track via its inserts. This process feeds the dry sound to the first processor, which then feeds its processed result to the next, and so on, thereby creating a chain of effects which run in series from one to the next.
In an easier explanation, you use a plugin to process your kick drum heavily then you play with the ‘Mix’ knob to find the perfect balance of the dry signal and wet signal. This enables us to process the kick drum without ruining its quality and overdoing it.
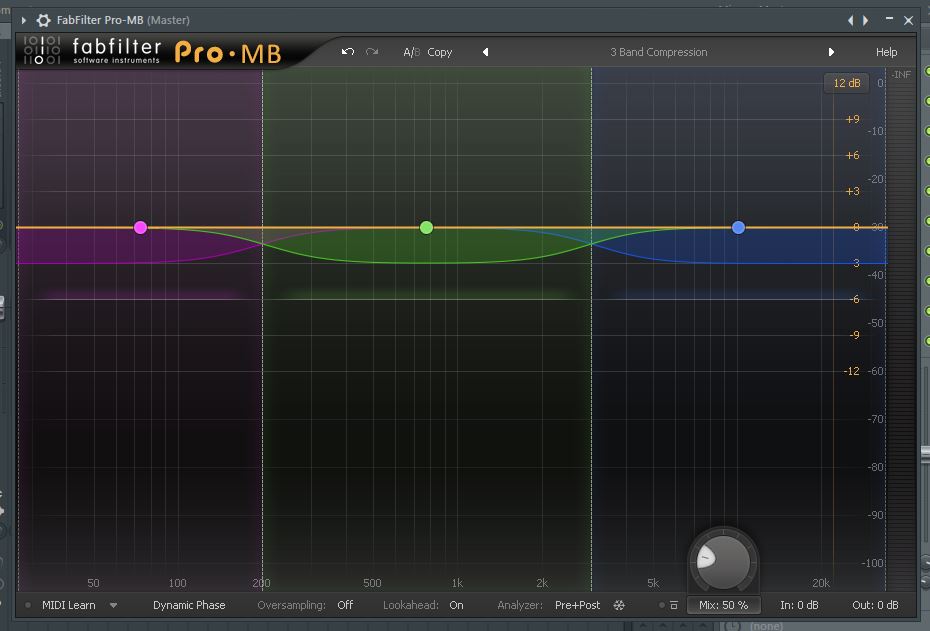
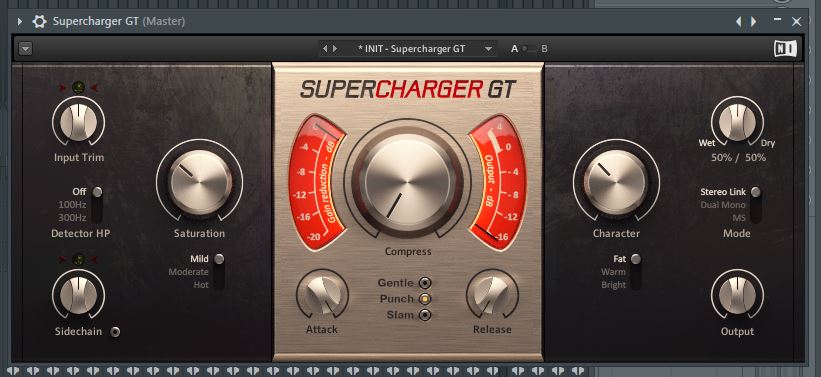
For parallel processing of the kick drum, I always like to use ‘Supercharger’ or ‘Fabfilter Pro MB’ plugin. Supercharger is a plugin for saturation and compression whereas Fabfilter Pro MB is a multiband compression plugin. Feel free to try parallel processing with these 2 plugins although they have different functions as they can take your kick drum game to another level.
6. Choose wisely
There’s no point choosing a sloppy kick drum and put in lots of effort to try and fix it. Doing this can kill your workflow and potentially kill your vibe of trying to produce a song with it. Try to collect all the kick drums you have in a folder and delete those which doesn’t sound great or awesome to you. Next time when you want to search for the right kick drum, you’ll know which one to pick faster and this saves up a lot of free space in your hard drive as well. Stick to certain sample pack companies that you truly trust and invest in.
This concludes the 6 ways of tightening your kick drum. I hope that you enjoy reading this and learn something from it. If this article has improved your mixing skill for your kick drum, feel free to share this article with your fellow producer friends to help them and give them a nudge in the right direction in music production.
Thanks again for taking your precious time to read this article and sharing it.
PS: Give us your email and we’ll send you 10 kicks and a few video resources on how to make your kick tigher.
_Cropped.png?width=1600&name=02%20(2)_Cropped.png)


Your Comments :