


How to Acoustically Treat Your Studio Space
When you're first introduced into the world of music production simply having a computer and a pair of headphones is all you need to create incredible music. Somewhere along the line, you may want to upgrade to a pair of studio monitors and create a studio space for yourself. Whether producing from a desk in your bedroom or having a separate space set aside for music, taking the right steps to acoustically treat a room will lead to better overall mixes. What is acoustic treatment? Acoustic treatment is the process of taming areas of a room that could reflect unwanted frequencies in your mix. Making your room a more stable environment to produce better quality sound.
What Already Works For A Bedroom Studio?
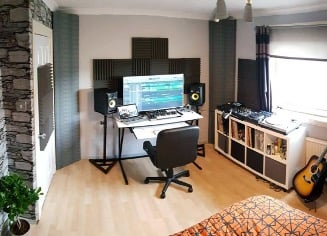
When thinking of acoustically treating your room you might be surprised what's already working in your favor. Your bed and bed frame will absorb a lot of low end in your room. Depending on where your bass traps are, you may want to move your bed in that area to absorb some of those frequencies. Rugs, Tapestries, and Pillows will also absorb some of the frequencies in your space.
Speaker Placement
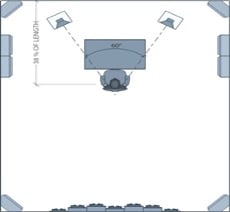
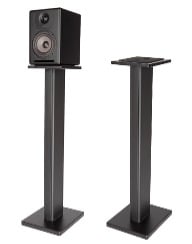
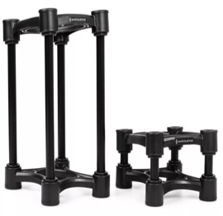
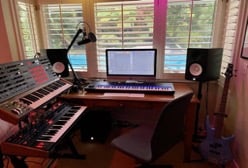
To get the best sound out of your studio monitors you're going to want them sitting equidistant from the center of your workspace. Imagine an equilateral triangle. You are at the tip of the triangle and your speakers should be equally spaced apart and angled inwards towards you. Depending on the size of your desk you may want to invest in a pair of monitor stands to create the appropriate distance between you and your monitors.
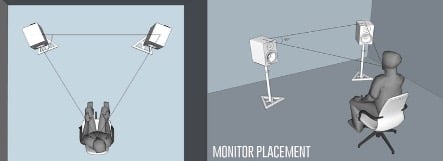
If you can, avoid placing your monitor directly on your desk. Even with foam padding, they are known to cause unnecessary reflections and vibrations in the room. Having the monitors as isolated as possible will produce the best sound. When using monitor stands it's best to place them behind your desk closer to the wall. Make sure not to touch the back of the speaker to the wall, this will lessen the low-end frequency reflection coming from the back of the monitor.
Reflective Materials
Glass or metal in a studio space can be extremely reflective while mixing or producing. You want to face your studio monitors away from any windows in the room. Since studio monitors are direction most of the sound will be projecting inward from the window preventing the glass from reflecting frequencies. You may also move or cover larger pieces of metal with a blanket or tapestry to prevent as much reflection as possible.
Bass Traps
A bass trap is a part of the room where low-end frequencies gather usually residing in the corners or pockets in a space. You can find the bass traps in your studio space by walking around the room while playing a song that has a more tame low end. You'll notice the low end becoming louder in certain portions of the room further away from your studio monitors. There are relatively inexpensive solutions to deaden a bass trap. Thick tapestries, angled acoustic foam, or even thick blankets can all be worked into a corner to reduce low-end frequencies.
Reflection Points
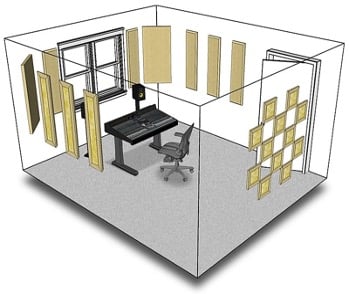
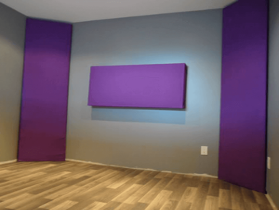
Following the path of your speakers, you can listen for their reflection points. These are usually the sides of the room, the back wall, and the ceiling. The heaviest amount of acoustic padding or panels should be located in the back of the room. This will help deaden the room for mixing and stop reflections hitting the back wall. Setting up panels or foam on the sidewalls will stop reflections coming from your angled studio monitors. The ceiling is often overlooked as a reflection point, but depending on the material could be causing a ton of unwanted character to a room. Using two well-placed panels spaced out in the center of the room, or two rows of acoustic foam padding can help dampen the room.
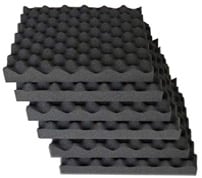
Sound Treatment Panels VS Foam
Properly insulated acoustic panels are the best for acoustically treating a studio space, but they can be very expensive. You can also run into issues with installation if you're not using a permanent space. For instance, if you're using a spare room, a bedroom, or rented space, a cheaper alternative solution is acoustic foam. You can purchase quality acoustic foam pretty much anywhere, even on Amazon. Using small nails or thumbtacks, you can easily install and relocate the pieces of foam as you please.
Acoustic foam provides a lot of the quality dampening in a studio space but just isn't considered as effective as studio paneling. Typically comprised of wood, fabric, and rock-wool, acoustic paneling has a much higher density and is much more effective when treating acoustics. More experienced music producers and engineers may upgrade to higher quality acoustic panels down the line to improve their mixes.
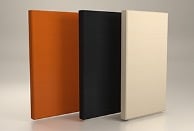
There are even panels specifically meant for diffusion. Usually made out of specialized foam or wood. Meant to soften the reflections of a sound and equally spread them throughout a room. These are usually found on the very back wall of a studio space. Sometimes they may even be used to diffuse reflection on the sides or ceiling of a room depending on what room character that producer is looking for.

DIY Acoustic Panels
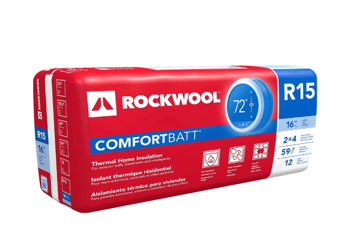
WARNING: Be very careful when handling Rock-Wool or ANY type of insulating material. They are comprised of small particles that could damage your lungs and skin if handled improperly. Be sure to wear workers' gloves and a face mask. DO NOT DO THIS INDOORS IF POSSIBLE
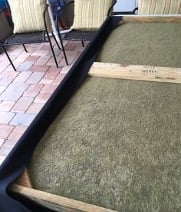
Proper acoustic paneling can be very expensive, but there are ways to make your own paneling for a fraction of the price. All you need are the proper measurements, a solid insulating material (preferably rock-wool), wood planks, nails, screws, and a dense fabric to keep the insulating material in place.
You can purchase properly cut wooden planks at your local hardware store, as well as the necessary amount of insulation. Make sure to measure enough space where your insulation will sit nicely and enough fabric to cover both sides of the panel. Either nail or screw your wooden planks into the shape of a frame having one beam in the center to support the outside of the panel
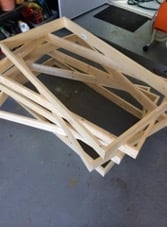
Fill the frame with your insulating material making sure to pack it tightly. Then using your cut and measure fabric, nail or staple the fabric around the sides of the panel to hold the insulation inside. Don't leave any gaps for the insulation to fall through. You don't want any of it floating around your studio space.
Remember, the panels don't always have to look nice. They just have to do their job. You can have brilliant mixes through headphones or even in a room that isn't as treated, but following these steps to acoustically treat your studio space will yield better-sounding mixes in your music production

_Cropped.png?width=1600&name=02%20(2)_Cropped.png)


Your Comments :