


You have been collecting samples since the beginning of the music production journey.
Have you ever imagined the amount of samples which you have been collecting?
Sometimes the amount is bigger than we have ever imagine.
Find a perfect kick drum is just like finding a needle in the sea. It takes forever.
That is why we put on the habit of organizing our sample library. It may be difficult at first because of the size but what it brings is very worthy for doing it.
Let me show you the way I organize my sample library.
I like to create 2 sections for my sample library:
All Samples
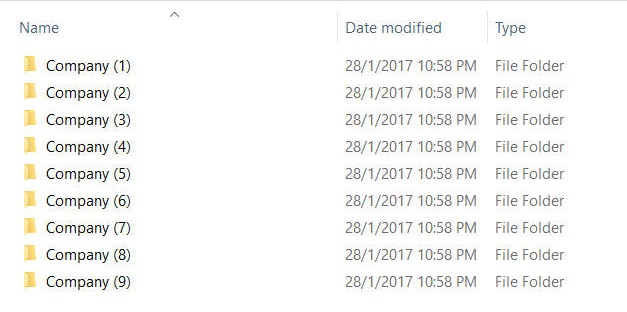
This is where all the sample libraries are located. In this folder I like to organize the samples according to the company. When we trying to grab new sample libraries, we often find ourselves going to the same companies which we truly trust them in in term of quality of the sample library.
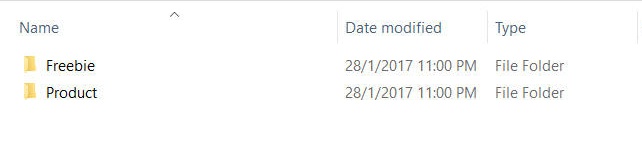
Within each company, I will separate the samples again into Free folder and Product folder. I like to separate Free Download samples and Paid product samples as there might is a difference in quality between both of them.
Favourite
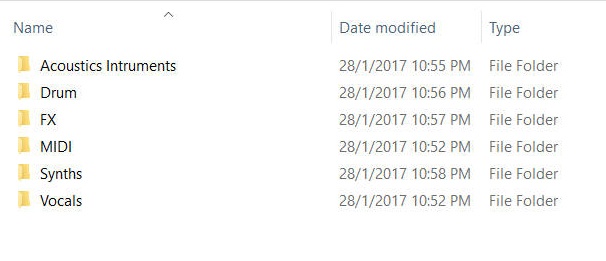
Favourite folder contains the samples which I love the most and have high chances to be used when I am writing my music. I suggest you guys to go through all the sounds when you just grab a new sample pack and handpick your favourites. Then, put them in the favourite folder before putting the whole sample pack in the All Samples folder. In the favourite folder, I like to organize them according to the type of the samples. Just like in the picture above, I have acoustics instruments, drums, sound effects, MIDI files, synths and vocals.
But with just organizing your samples like this isn’t enough yet, you need to label your samples with their musical key.
There’s a great software named KeyFinder which is really helpful in labelling musical key.
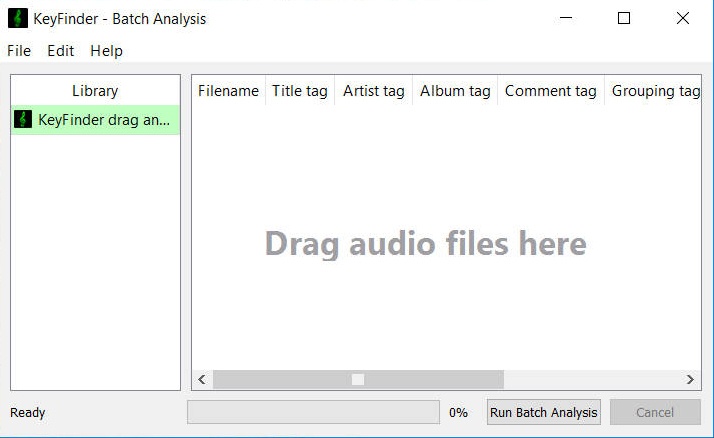
You basically just drag and drop your samples into the program and run the batch analysis. The job is basically done after that.
But before running the batch analysis, there’s a thing which needs to be done.
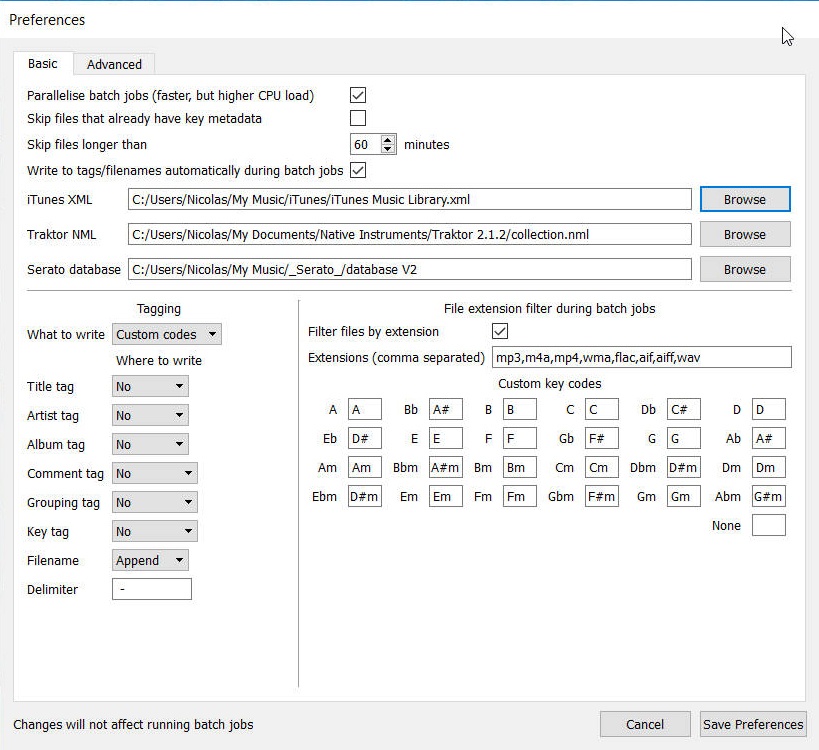
Go to the preference by clicking “Edit” then “Preference”. There will be a pop up which looks like the picture above.
Tagging Section:
1. Change What to write option to Custom Codes
2. Change the Filename option to Append.
Custom Key Codes:
Fill in the blanks just like what’s shown in the picture above.
Once you’re done these 2 steps, prepare for the magical moment when you run the batch analysis.
KeyFinder really is the life safer for music producers out there when it comes to labelling musical key.
What’s your tips in organizing your sample library?
Share them in the comment section below.
Grab the sample library template now HERE to start organizing your sample library.
Have a great day.
Your W. A. Production team
_Cropped.png?width=1600&name=02%20(2)_Cropped.png)


Your Comments :