


“How do I get a fuller, wider sound?” That is a common question within the community of electronic music producers. While each professional producer has their own formula, and there is no 100% right way to handle your audio production, there are some basics that will help you get the end result that you want. Making music is much like everything in life. Trial and Error.
This article is going to cover some basics and quick tips. For a more in-depth approach to layering check out our online courses below.
Layering Drums
Click HERE
Layering Synths
Click HERE
The Secret to Wideness
Click HERE
While these techniques can be applied in any DAW and use of an EQ, I will be using FL Studio 20 if you would like to follow along.
KICK DRUM
There are a couple of reasons for layering kick drums. The bottom line is that you want to make something with more beef, more punch, and to be able to shape it to fit your project.
I have chosen 2 kick sounds that both have great qualities. However one carries more high frequencies and the other carries low frequencies. Even when I EQ them separately, they just fall short. Layering allows me to have the best of both worlds.
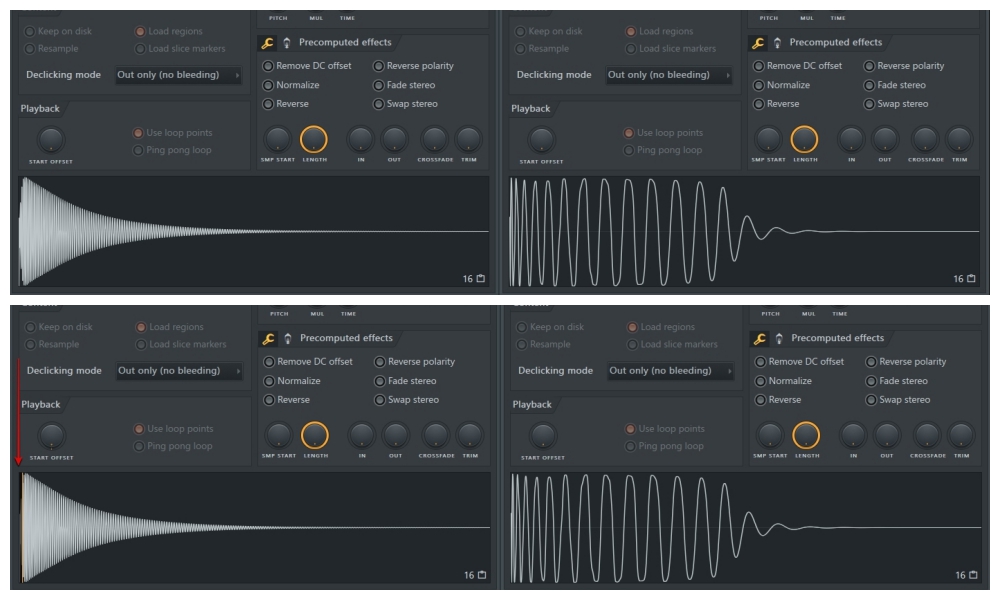
Here are the 2 kick drum sounds I will be using.
DRY KICK 1
To listen click HERE
DRY KICK 2
To listen click HERE
To keep things organized and easy to manage I changed the name of each one. KickHigh and KickLow. This makes it easy to know which one is which. I routed each sound to a mixer track and applied an EQ to each track.
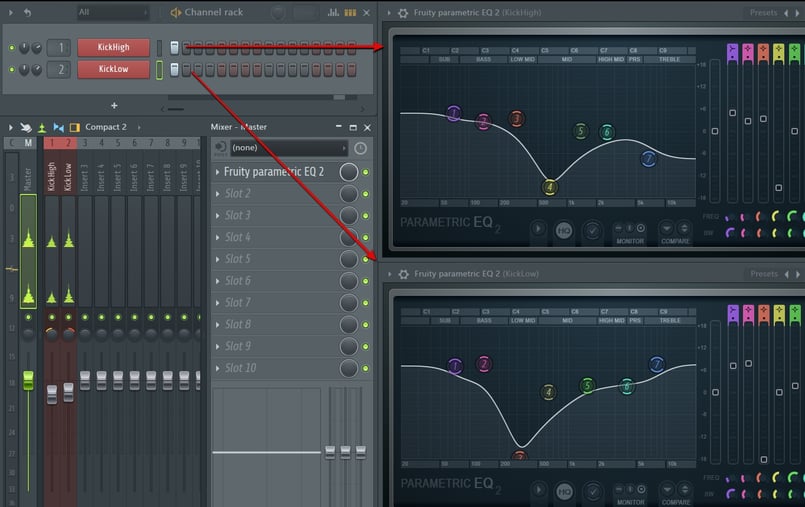
For KickHigh and KickLow I got rid of the mud. The mid-range frequencies. For KickHigh, I raised the lower frequencies since it really didn’t have much to offer. I lowered the highest frequency and gave a little nudge to the mid frequencies that I loved about it.
For KickLow I bumped up the high frequency it was lacking and gave a nudge to the low frequencies that sounded amazing.
From there I panned KickHigh subtly to the left and KickLow subtly to the right. I did this to make sure I could hear each sound equally and to ensure they were both hitting at the same time with no delay or offset. I then set my volume levels to ensure no clipping and that the sounds were coming together.
My end result? A kick that takes priority in the punchy frequency range, while still having mid-high frequencies so that listeners with headphones or a smartphone will still hear it. This is a kick you can hear and feel.
PUNCH THROAT KICK
To listen click HERE
Now that I have my kick sound I can apply any finishing touches to shape the sound and then render it as an audio sample, ready to import into my project.
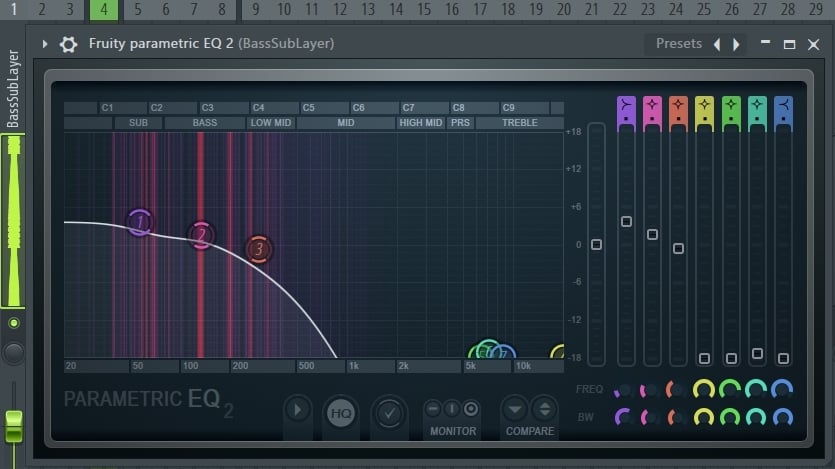
BASS LINE LAYERING
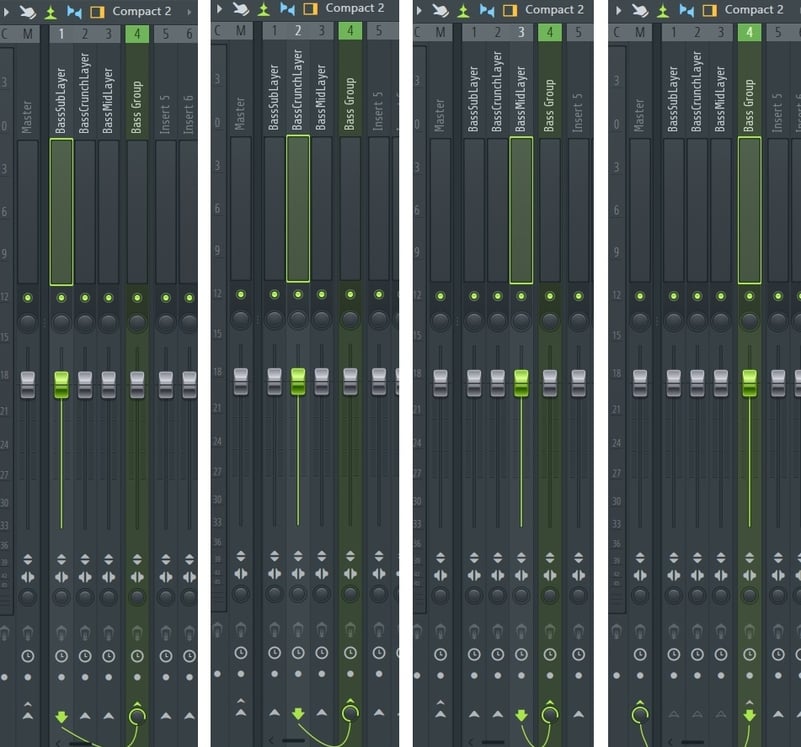
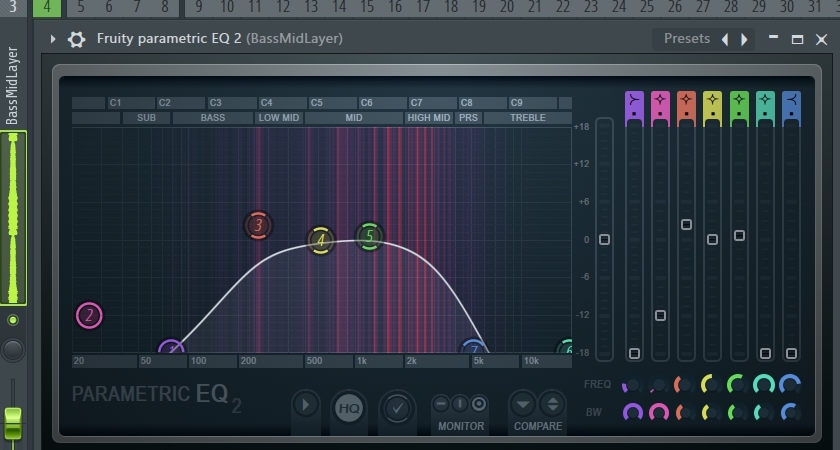
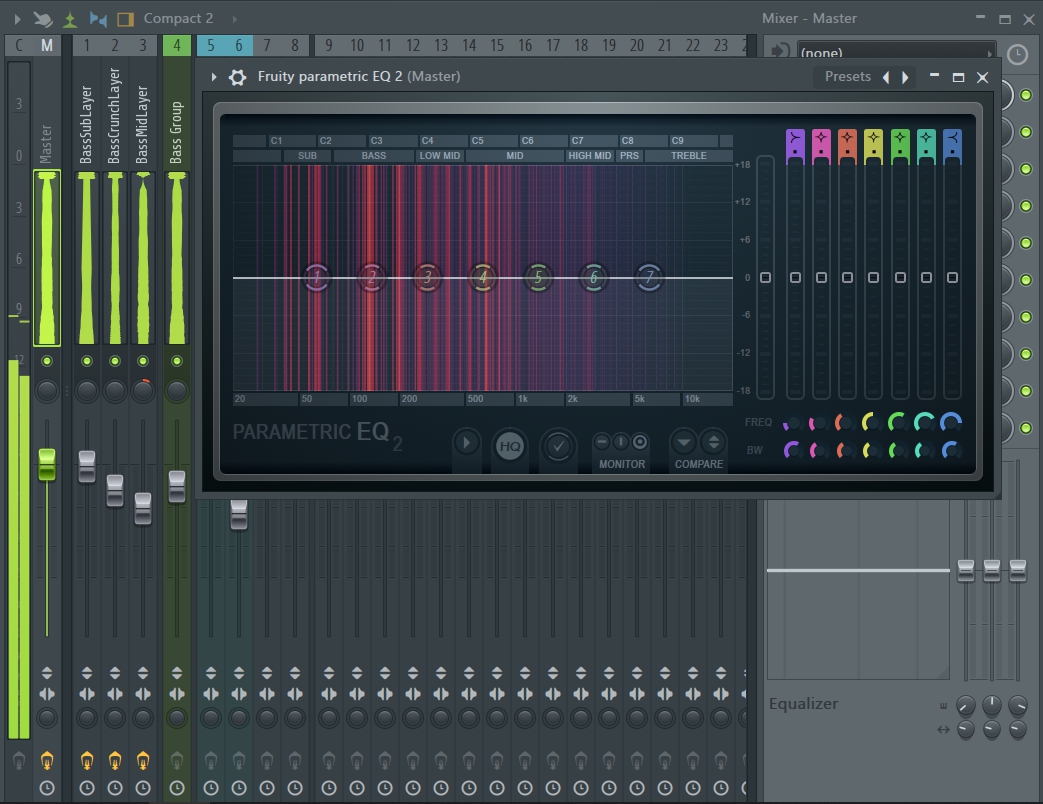
For this one, I am using 3 different sounds. The first is smooth and deep, the second has a little bit of a crunch to it, and the third fills everything out in the mid-high range.
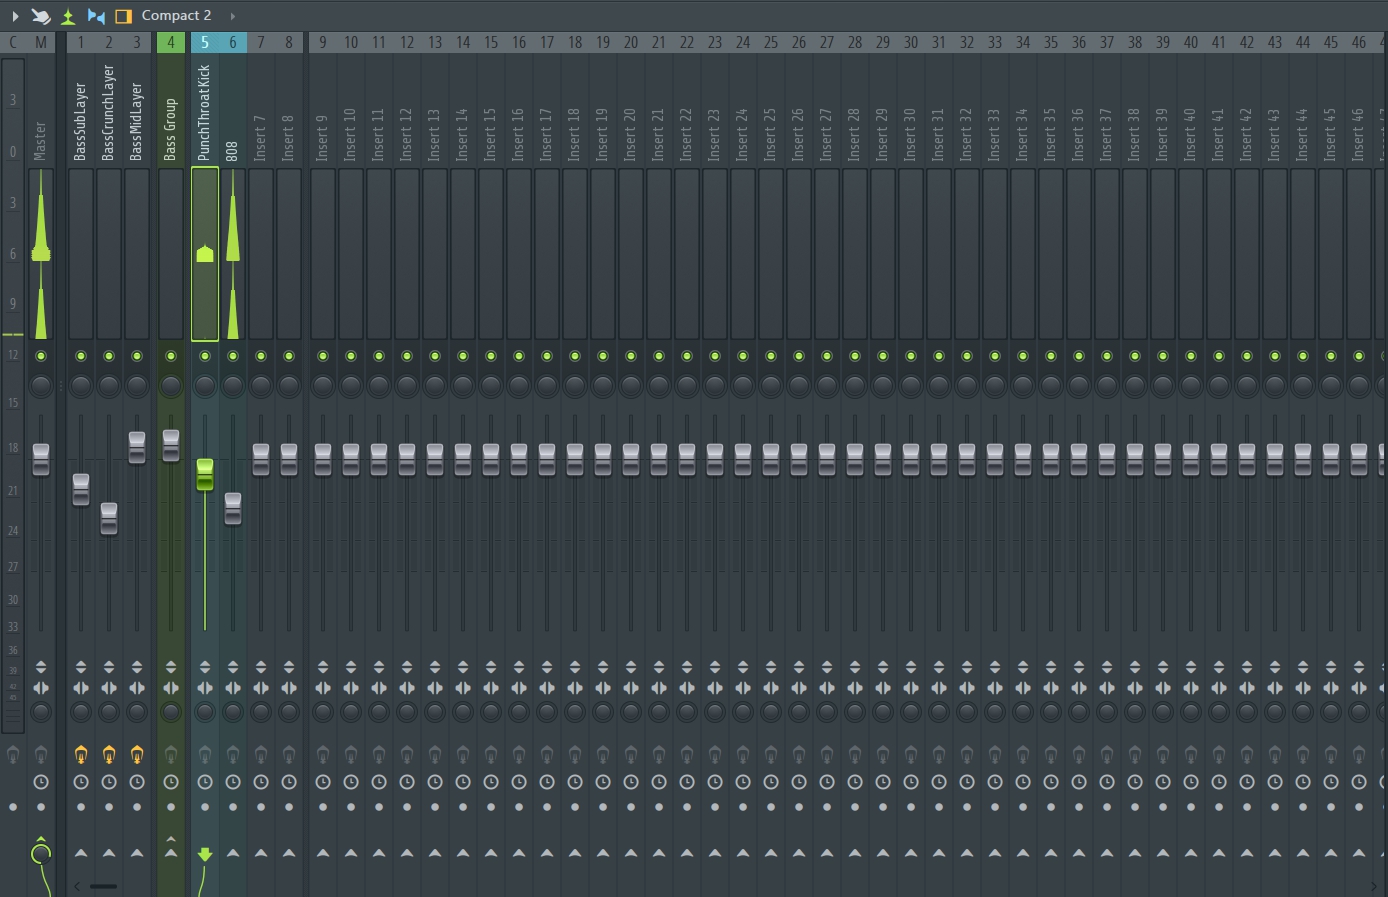
The first thing I did was route each sound to a mixer channel. The next step was creating a group. As you can see in the image above, each sound is now routed to Insert 4. Insert 4 is then routed to the master fader.
Just as you do with the kick sounds. You need to find sounds that compliment each other. If all of the sounds you choose are heavy in one frequency range, you will want to spread it out.
The first layer has been designated to fill the low, and low-mid range.
Bass Layer 1
To listen click HERE
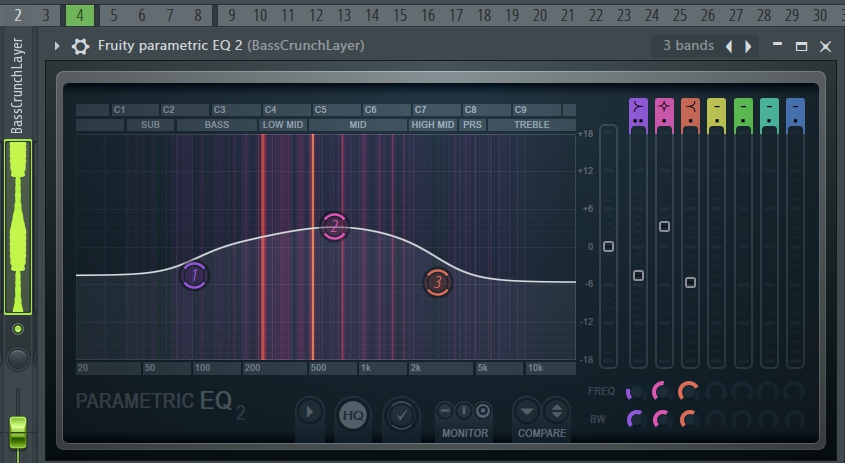
The second layer has a slight decrease in the low and high range frequencies and is elevated in the midsection.
Bass Layer 2
To listen click HERE
The 3rd and final layer has its space made in the mid and high range.
Bass Layer 3
To listen click HERE
I am going to compare my dry sound to my wet sound. If the sounds do not compliment each other than layering isn’t necessary, I should EQ just one sound, or find another sound that does. Once both sounds are properly EQ'd and balanced they will work in harmony and sound fuller.
With a couple of volume adjustments. This is my bass layered sound.
Final Bass Layer
To listen click HERE

808 & KICK LAYER
This last section is how to pair an 808 with a kick drum. This way you get the initial kick punch that seems as if the 808 rolls out from it. It also helps your listeners that are using speakers or headphones that don’t have a full frequency response. Just because they can't hear or feel an 808, you can still fill that space so that you don’t lose that dynamic.
First, I adjusted the sample start time offset to the hardest hitting spot of the 808. This way they both hit the hardest at the same time.
The next step will offset that sound in milliseconds by adjusting the A.D.S.R. (Attack, Sustain, Decay and Release)
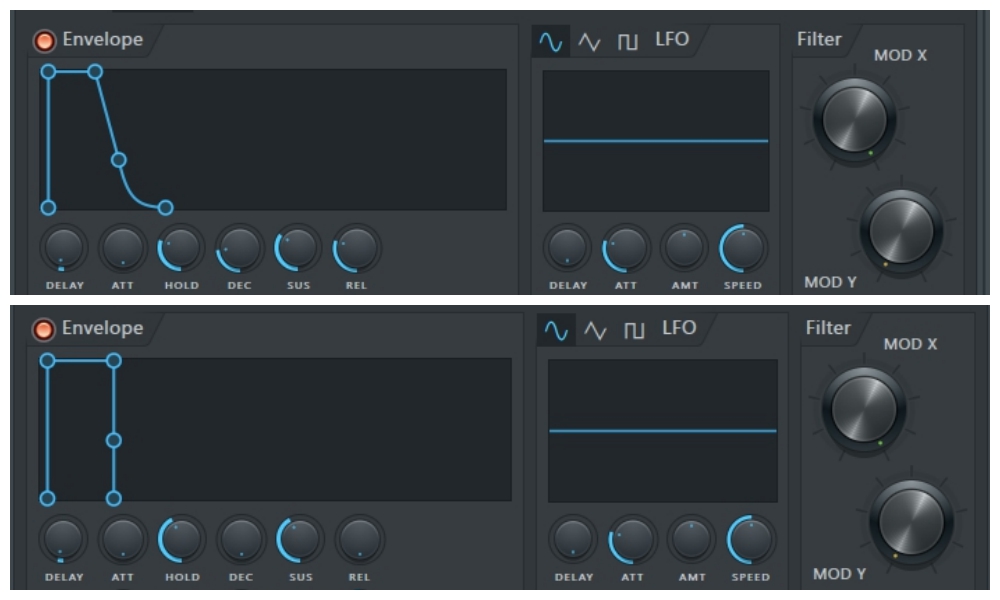
The first image shows you the 808 as it is now. The image below it shows the changes that I made. Here are the settings I used. I will be moving backward, as the delay is the last thing I want to adjust.
- Release = 0
- Sustain = 40%
- Decay = 0
- Hold = 40%
- Attack = 0
then increased the delay time just a hair to give it that offset. So when you hear the kick it sounds as if the kick and the 808 are one sound.
My 808 doesn’t have a hard “boom” at the start. That is where my kick sound now is. The tail of the 808 now is the tail to my kick drum.
Now that you have learned some quick ways to use layers to make your mix wider and thicker, you also made sounds that can be heard by all listeners, no matter the quality of their device.
QUICK TIPS
Frequency Cheat Sheet. The range of human hearing is 20Hz to 20,000Hz or 20kHz. There is a great video that demonstrates hearing frequencies. Check it out HERE.
- 0-60Hz Sub Bass
- 50-80Hz Chest Punching Bass
- 60 - 250Hz Lead Bass
- 120 - 350Hz Everything Range
*Most every instrument will take up some space in this range. The goal here is to remove it from sounds that don’t need to have it. If you do not, you will have too many sounds in the same range. - 350 - 2kHz
*Too much time in this range can cause actual ear fatigue. Subtle boosts, however, can help make the sound wider. - 2k - 8kHz
*Boost this range if you want a sound to stand out more. This frequency range also gives the perception that the sound is closer to you. - 12k - 20k
*When this range is enhanced it creates air and openness. However, it can also be obnoxious and ear piercing depending on the sound.
Phase Cancellation
If you take the exact same sound, duplicate it, and push play. What happens? The original sound gets louder. Well, what if they are out of sync and reach their highest peak correlating with the others most negative peak? This will result in a negative level of the combined sound. 180 degrees out of phase. When both sounds are out of phase they will cancel each other out.
How to avoid this? Well, most DAWs have a neat overlooked option. Reverse Polarity. If you select this on one of the samples, you will be good to go. Another way is to use a delay effect or simply adjust the timing. Not a huge adjustment. Only by milliseconds.
Frequency Overload
Too much low end is usually where most fail. If you are using a high pitched instrument such as certain strings, lead synths, and pianos, cut out the low end with a high pass filter. Let the bass occupy the low-end space, and put the highs where they belong. This lets the sound to breathe in their open space.
Wider is Better
Once your track is complete and you are giving it a good listen to and you notice that something still doesn’t sound right. Here is some food for thought. Why is that when you have 4 speakers everything sounds thin and nothing stands out? The sound is coming at you at 1 volume and straight at your face. Each instrument should have it’s own respective place and volume within the track. Each track does not need to be at the same volume level.
Panning
You are trying to please the ears. Create a realistic scenario. Try panning your drums like a real drum kit. Hi-hat a little to the left. Crash cymbals a little to the right. You will notice by soft panning your drums your track will give the listener a sense of direction. Hard panning on subtle sounds can increase their presence.
Reverb
Create a sense of space for your sounds, this is a good way to widen your sound. Some sounds work well in a huge auditorium, while others work well in a smaller room. By creating that illusion of depth and size, you can add dimension.
While there are a million ways to go after a wide, clear, professional mix keep this mind. Don’t overdo it. Keep it simple and subtle. And never be afraid to think outside of the box. Turn every knob and see what it does. By experimenting you may just stumble onto the perfect recipe for your sound.

_Cropped.png?width=1600&name=02%20(2)_Cropped.png)


Your Comments :