


For newer users discovering some of the most useful functions in FL Studio has never been so easy. Even for the Pro’s out there, does trying to keep an organized workflow seem too time-consuming? Well, guys, we have some quick tips and amazing tricks to show you that will save you time and help you get the sound you want quickly and just as accurately as if you did it the long way.
We will be covering Patcher, Side-chain, and an LFO (low-frequency oscillator). Go ahead and open up FL Studio and let us begin.
PATCHER
This is a great tool for keeping an organized workflow. Rather than consume multiple channel racks, mixer, and effects slots, you can save yourself the hassle and use Patcher. In this instance, I will show you how to layer in Patcher.
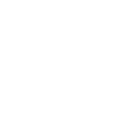
First I would like to show you a comparison using Patcher VS. a usual set up. Typically to layer one sound and another instance of the same sound, modified, and bring them together, it may look like the image below. The plugin loaded twice in the channel rack, routed to individual mixer tracks, effects added, automation added. By the time you are done, you could have the channel rack, the 2 plugins, the mixer, the effects used, and …. everything, everywhere.
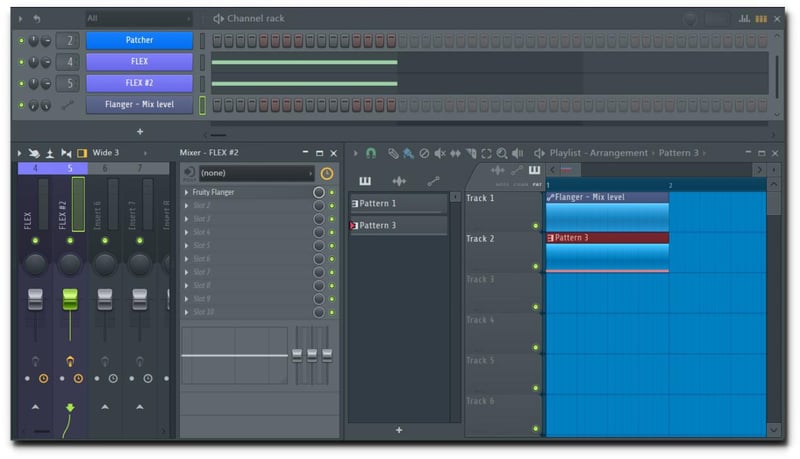
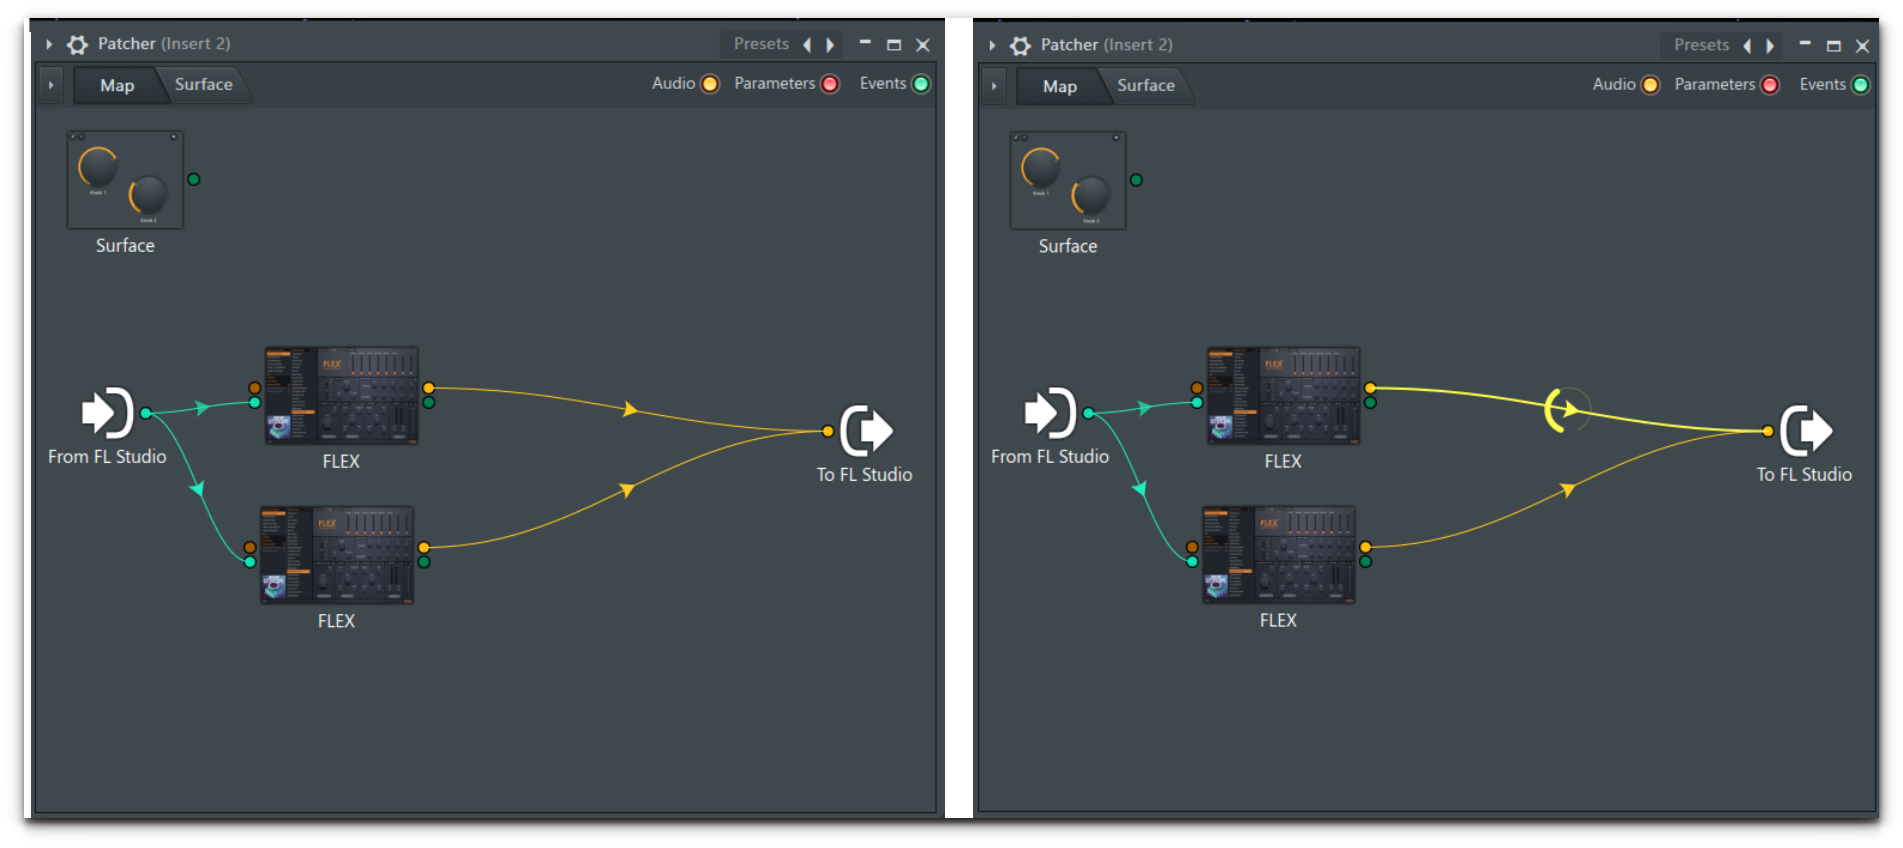
Here is how the exact same process looks using Patcher.
Nice, neat, and clean. You don’t have to close or re-open a million different things to be able to modify what you want. In this example, I am using 1 channel rack spot and do not have effects loaded on the mixer.
Here is how.
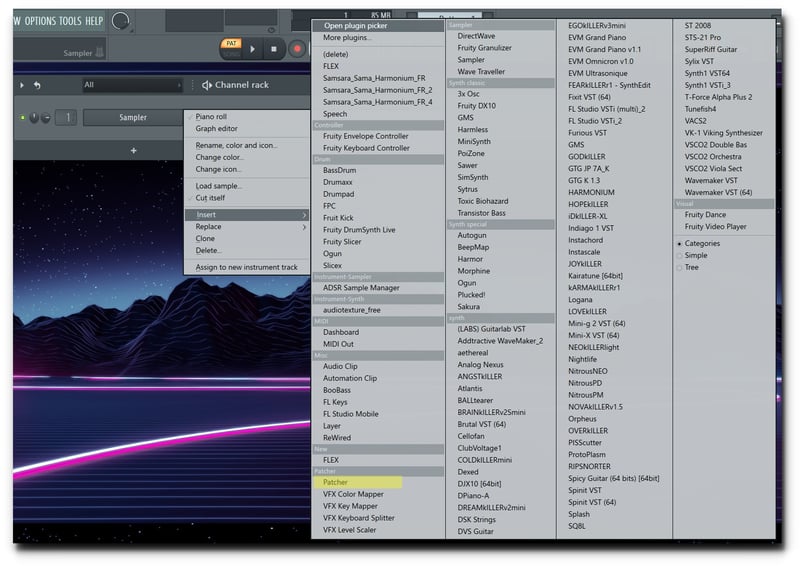
In the channel rack, select add. From the plugin selector, choose Patcher. Below is the Patcher interface.
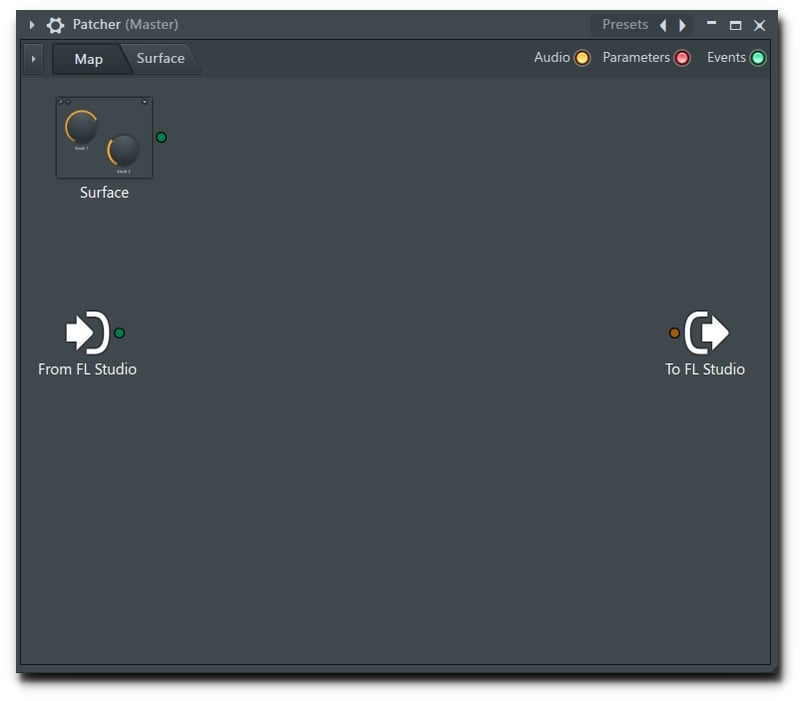
Simply right-click to add instruments and effects.
You can even adjust how much of the instrument you want coming through as well as add effects and adjust their amount as well. Other things you can do are create controls and automation, all right there on the Patcher interface.
SIDECHAIN
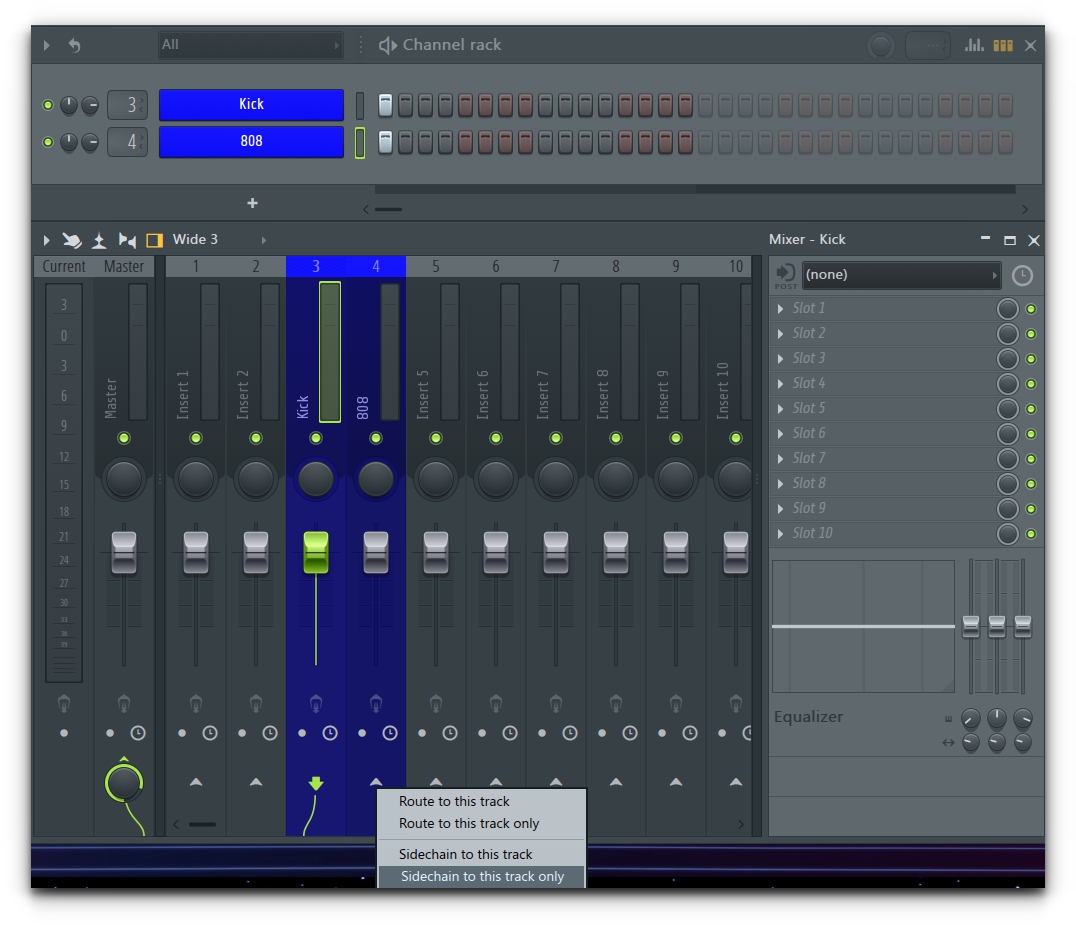
This is a quick setup to Side-chain my bass and my kick. The purpose of this is when the 2 play at the same time, they won't overpower everything else or each other. You can do this with any instrument or sound. Here is the 808 and Kick. Both are bass-heavy and hit hard. Route both to their own mixer track.

On the mixer track for the 808, right-click on the up arrow and select “Side-chain to this track only”.
On the 808 mixer track, go to effects and add the Fruity Limiter. At the bottom left, select “COMP”. At the bottom right, right-click on “Side-chain” and select “Kick”.
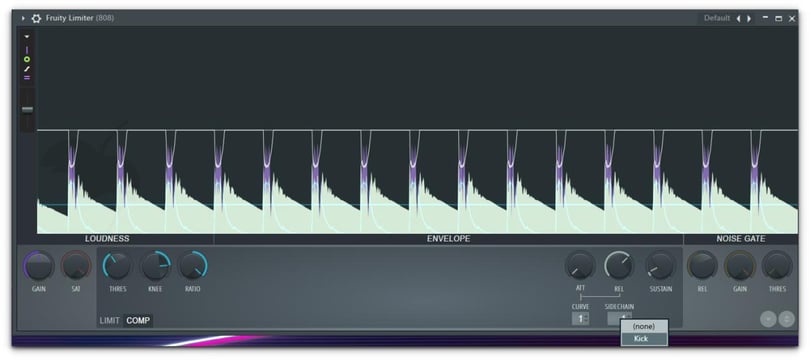
Now you can adjust the Threshold, Knee, and Ratio until you reach the level of side-chaining that fits your mix.
LFO [Low Frequency Oscillator]
Lastly, we are going to create a nice wub sound by using the LFO. There are 2 ways to do this. The first will be using the stock sound “Fat Cheese”. You can locate this by opening the menu and selecting “channel presets”, “3xOsc”, and loading “Fat Cheese”. Begin by placing a couple of notes. Then open the settings. Select the 3rd option (lines connected to 3 dots). Notice the LFO settings.
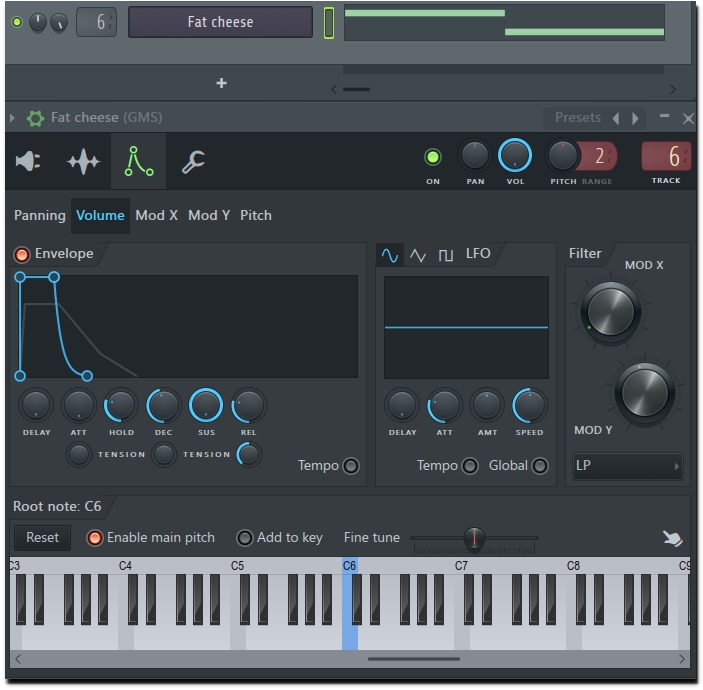
By adjusting the “speed” and the “amount” you can control how intense the sound is and how fast it is. You can also adjust the delay and the attack of when the sound begins to be affected.
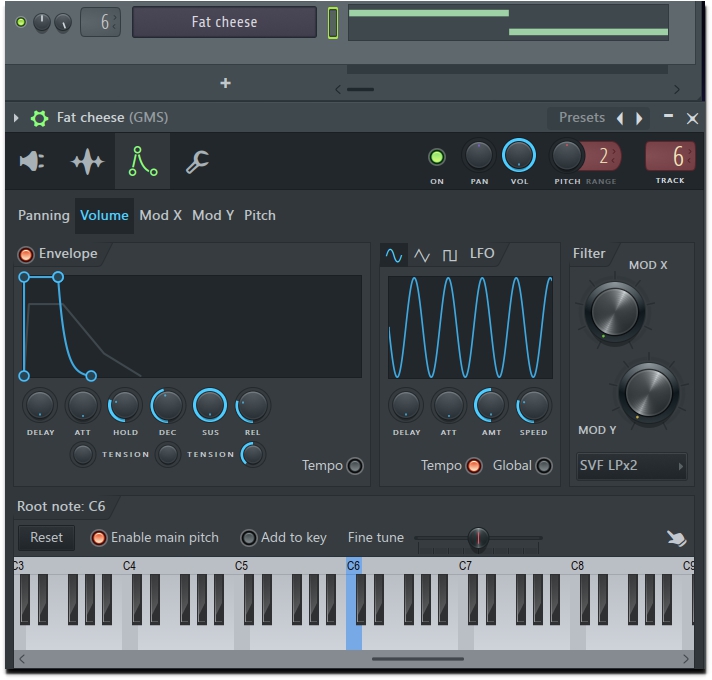
In the filter section, you can select LP(low pass) or LPx2 then adjust the “Mod X” to give it a more metallic sound. The other way to adjust the LFO is to go to the playlist. Click on the wrench, and select LFO.

And there you have it. 3 Quick Tips and Amazing Tricks for FL Studio 20 that will keep an organized workflow, modify and design sound and help keep a balance between your bass and kick.
_Cropped.png?width=1600&name=02%20(2)_Cropped.png)


Your Comments :