This is not a new issue. With everyone out there going bass crazy, how do you put the bass in its place? In FLStudio many users have asked this question, “Why is my end result so bass heavy?” The reason being is that the sounds are fighting over the spotlight due to occupying the same frequency space. To get an idea of what I’m talking about, picture a single narrow doorway. Now picture 5 people trying to get out of the same doorway. They all bury each other and no one gets through. That is what is happening to your sound.
Before I get started on how to correct it, I have created a cheat sheet that covers the average frequency range of a couple of instruments. It is not an exact science but will help when determining the sound you want and how to avoid multiple sounds duking it out over the same frequency space.
Kick
- 40 to 60 Hz – Bottom
- 60 to 100 Hz – Chest Pounding
- 100 to 200 Hz – The Prime Rib
- 200 to 2000 Hz – In the Mud/Ringing
- 2000 to 4000 Hz – The basketball bounce
Snare
- 200 to 400 Hz – Most snares fall here
- 400 to 800 Hz – Ringing, Hollow (if you are familiar, that dreaded sound on Metallica’s St. Anger)
- 2000 to 4000 Hz – Rice Krispies. Crack. Pop.
Toms
- 100 to 300 Hz – Boom
- 3000 to 4000 Hz – Hitting the nail on the head
Cymbals
- 200 to 300 Hz – Clanky Metal
- 6000 Hz and up – Prime Rib. Adjust to ad air and get that perfect “sssssss” of the hi-hat.
808
- 0Hz – 30Hz – Cut the Low end.
- 200hz and up – Can be adjusted if it’s too over driven or sounds like fuzz.
Pull back on the gain to avoid it distorting.
Synth
- 400 to 600 Hz – In the Mud
- 1000 to 2000 Hz – This range will allow the subtle parts shine or push them back to allow another instrument shine.
- 3000 to 4000 Hz – Too much and ears are bleeding. The right amount will determine how much presence is ….. well …. present.
Vocals
- 3k to 4kHz – Typical
- 5k to 8k – The range for Sibilance, the “S” sound. Rather than apply the EQ a D-esser would be your best bet.
Ok, now that you know what to look for, open up FL Studio and let us watch it in action.
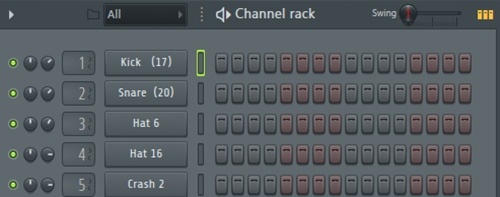
I have loaded up a kick, snare, hi hats, and crash samples.
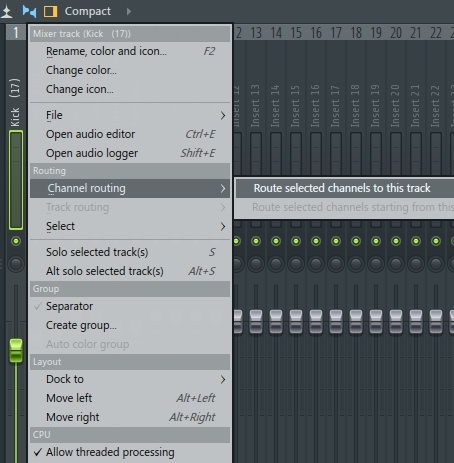
Next, I open the mixer and assign the sample to selected track.
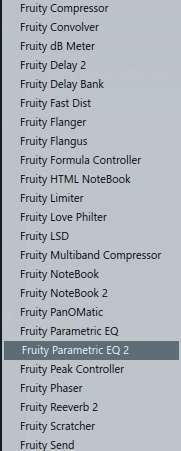
Select Fruity Parametric EQ 2.
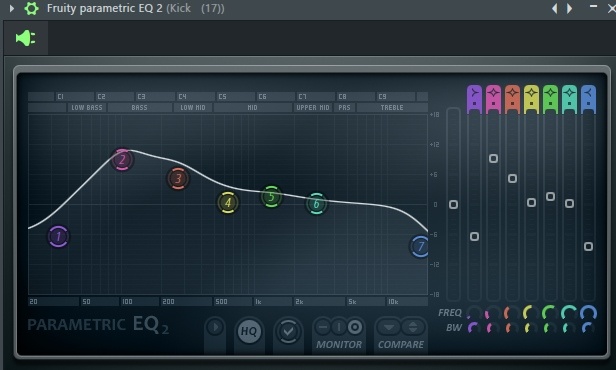
Along the bottom of the parametric EQ 2 you will notice 20 / 50 / 100 / 200 / 500 / 1k / 2k / 5k / 10k. these are measurements in Hz.
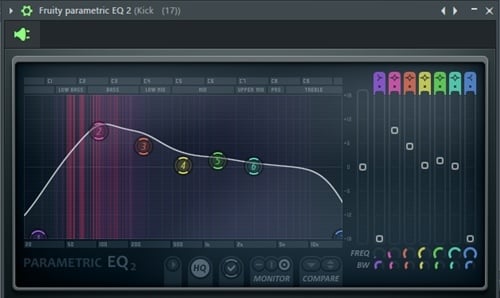
The kick I am using is sitting around the 50-100hz mark. Time to modify it. I have cut out Band 1 and got the inaudible stuff out of the way. At the 100-200 range sits band 2 and 3, so I went ahead and gave those a boost. So now when I’m in the car, my license plate isn’t rattling, but I am feeling that beefy punch. Since it is a low-end sound I also cut the high frequencies, band 7, out. That space is now open for other instruments and won’t drown them out.
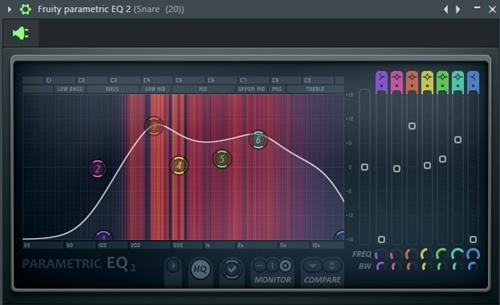
My snare is sitting around the right range of 200-400hz So I again, cut out the low inaudible sound of band 1 and cut the airy high of band 7. I increased band 3 in the 200 range to allow the snare to have that Rice Krispies “POP”
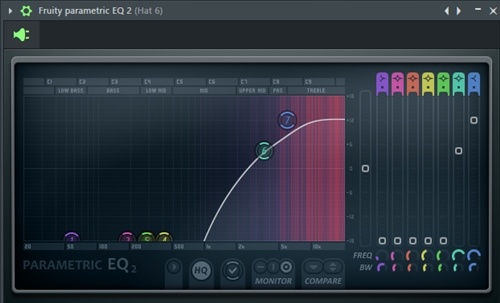
Here is my hi-hat adjustment. I have removed all low end to allow the high sounds to dominate.
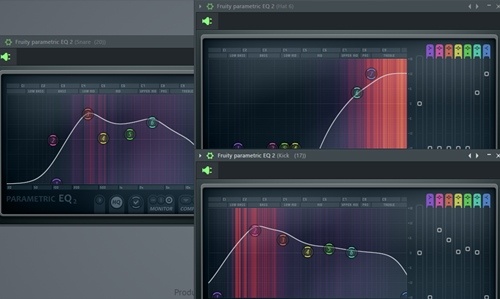
In unison here is my kick, snare, and hi-hat in action. Everything has enough room to breathe.
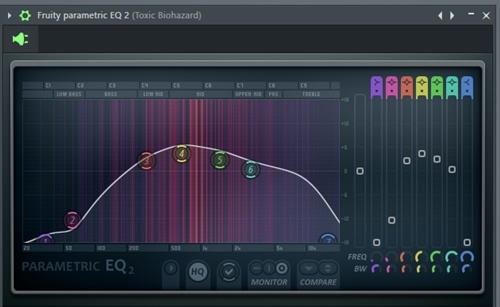
Now it’s time to add a synth line. I inserted Toxic Biohazard and followed the steps above, assigned it to the mixer and applied the EQ 2. I cut out band 1 and 7, lowered band 2, and increased the emphasis on band 4 with a little increase in band 3 and 5.
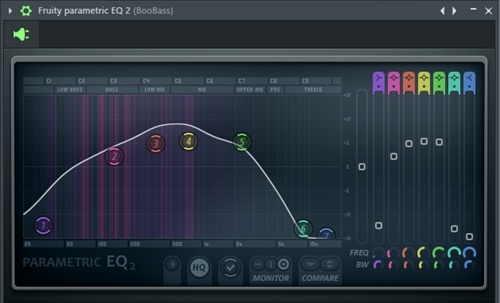
Then I added the BooBass plugin. So you can both hear and feel the bass line I increased the 5th band allowing it its own space and I did lower band 1, but not completely. I Increased the 2nd band, again its lifted enough to not occupy the same space as the other sounds I am using. Since its bass, I cut out the 6th and 7th band. (high freq)
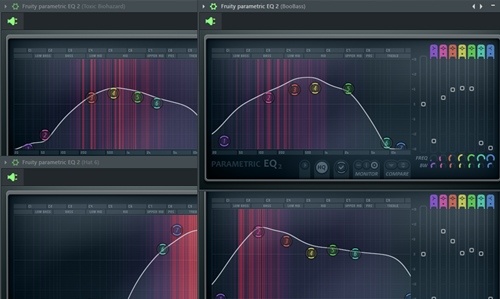
Now I have my kick, hat, snare, synth, and bass in unison. They all are functioning at an audible level and not competing for the same frequency. Thus not drowning each other out and creating that bassed out sound.
In closing, you will need to watch your volume levels while applying the EQ to ensure there is no clipping. Keep in mind sound is a matter of personal preference and what sounds good to some may not sound good to others. The EQ can save you or destroy you. Don’t be afraid to play around with it to determine what works and what doesn't for your sound.
Your W. A. Production team













_Cropped.png?width=1600&name=02%20(2)_Cropped.png)


Your Comments :