A sidechain compression is basically a compression using an external signal instead of the original signal. If this technique is implemented correctly and perfectly, it allows your drums especially kick and snares to cut through the mix. It also can add great bouncy punch to your low end and sound very musical.
But sidechain compression can be done in various of ways. What are the best ones?
I am going to show you my TOP 3 methods of doing it in FL Studio.
Volume Automation

1. Place the synth loop in the playlist
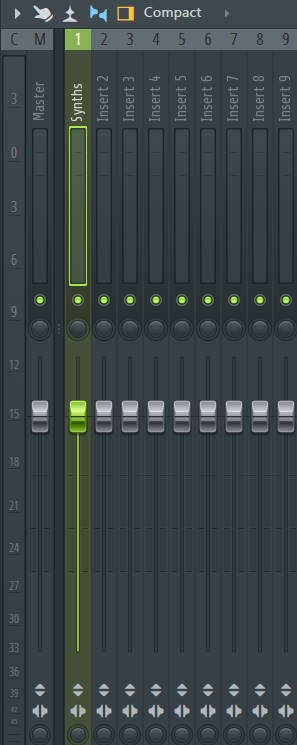
2. Assign it to a mixer track
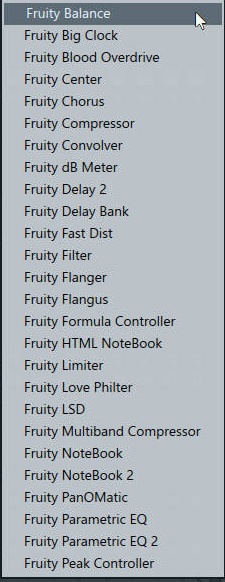
3. Click Fruity Balance
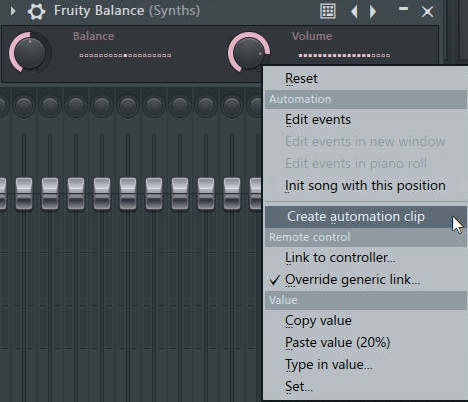
4. Automate the Volume knob
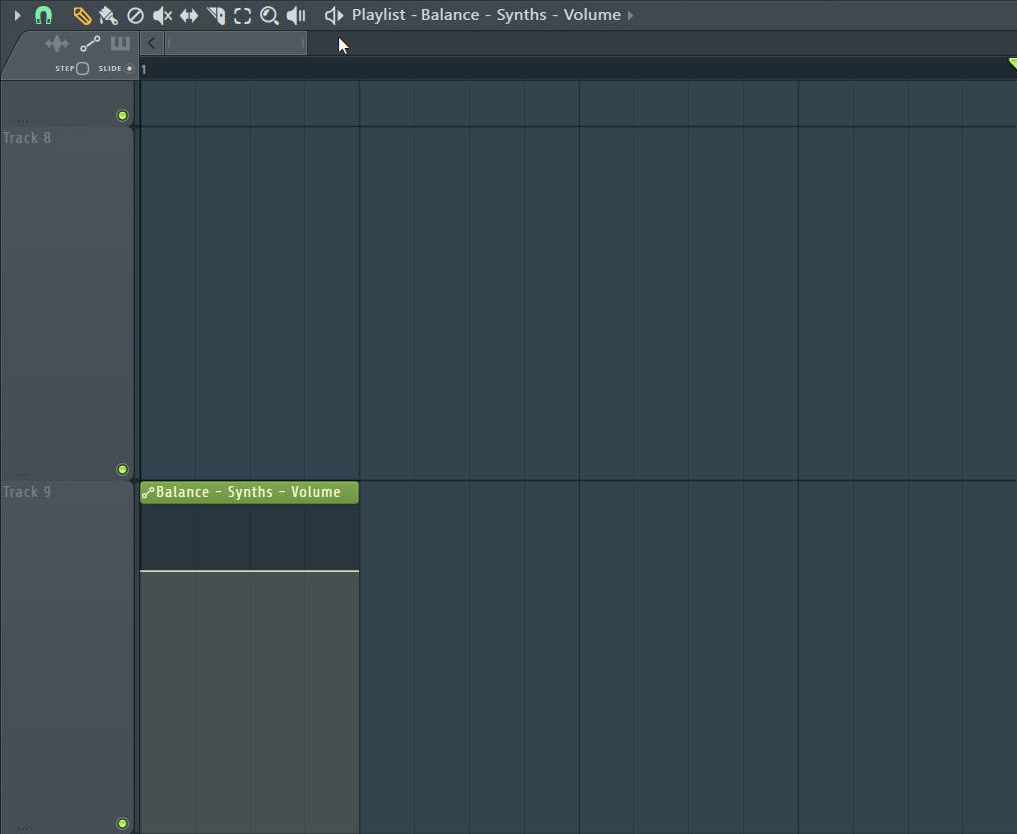
5. Decrease its length to ¼ of a bar
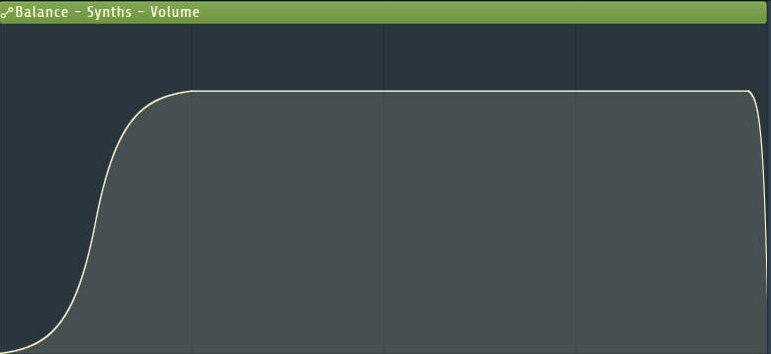
6. Draw the shape
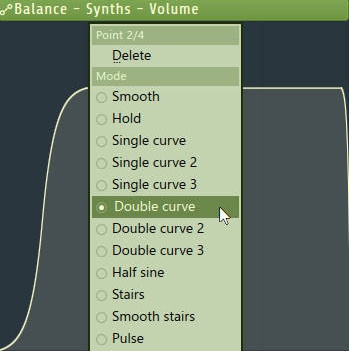
7. Make sure it’s a double curve at the second point

8. Duplicate them
I like this method because the shape of the volume ducking (sidechain compression) can be very precise and very easy to manipulate to suit the track itself.
Fruity Love Philter

1 Route the synth into a mixer track
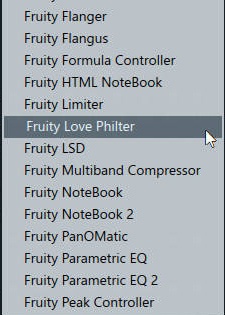
2. Select Fruity Love Philter
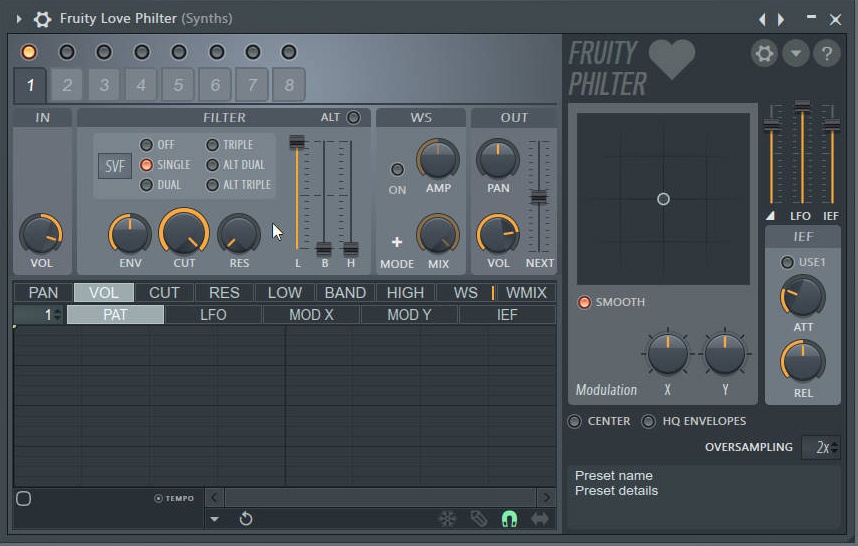
3. Modify the CUT and RES knob
Turn the CUT knob all the way up and the RES knob all the way down.
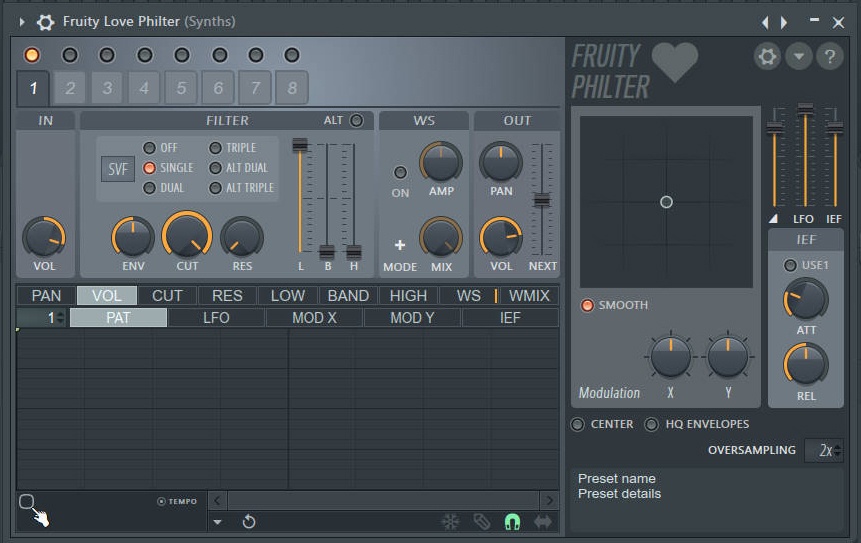
4. Enable envelope
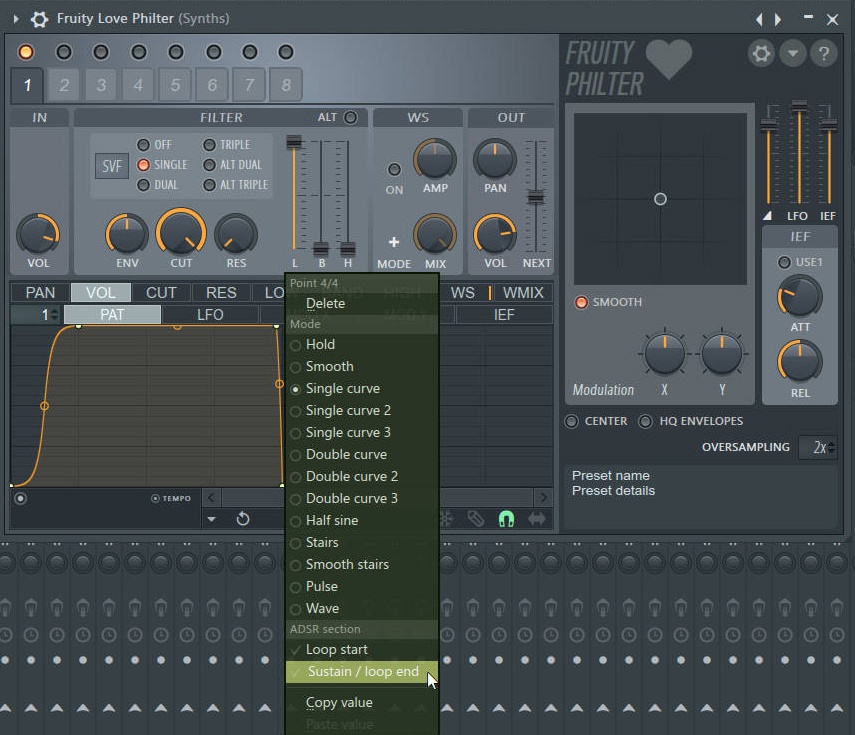
5. Draw the shape of volume ducking (sidechain) same as the one above.
Do not forget to right click at the last automation point and click “Sustain / loop end”.
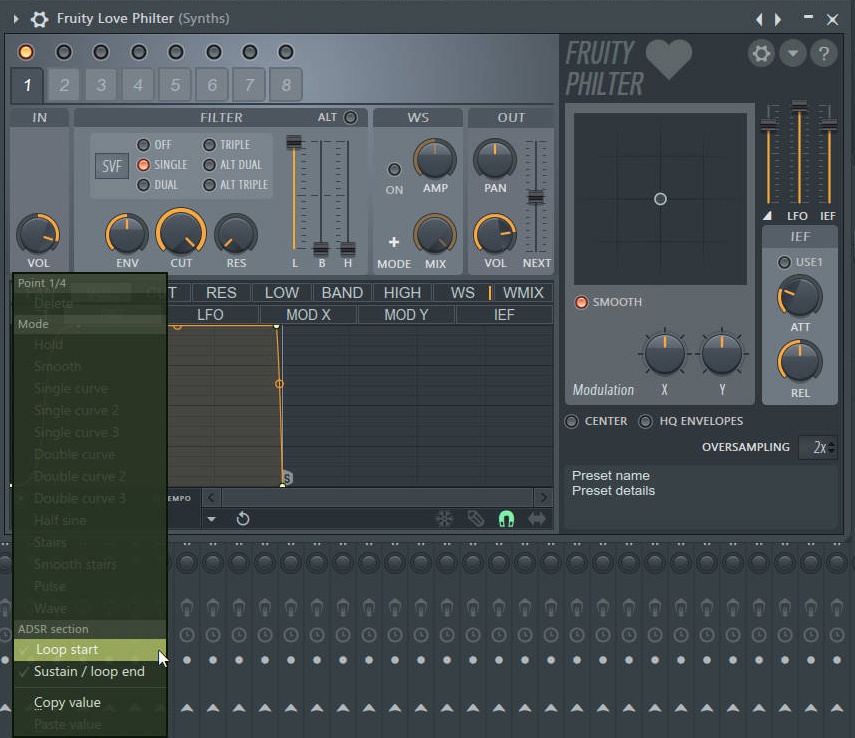
6. Right click the first automation point and click “Loop start”
You should able to notice the ducking effect when you hit the play button after doing the last step. The reason of why I like this method is because it’s similar to using LFOTools or Volume Shaper or Kickstart. If you do not have the budget to buy those plugins, this method is a good alternative.
Fruity Limiter
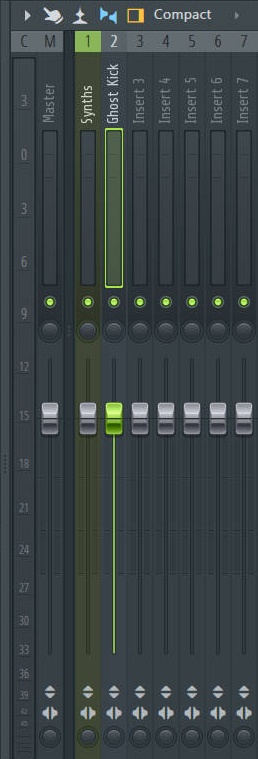
1. Route the synth loop and ghost kick into separate mixer tracks
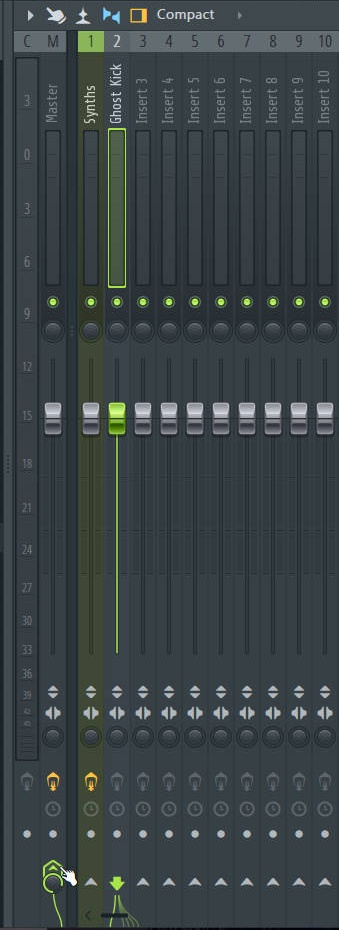
2. Disable send from Ghost Kick to Master channel
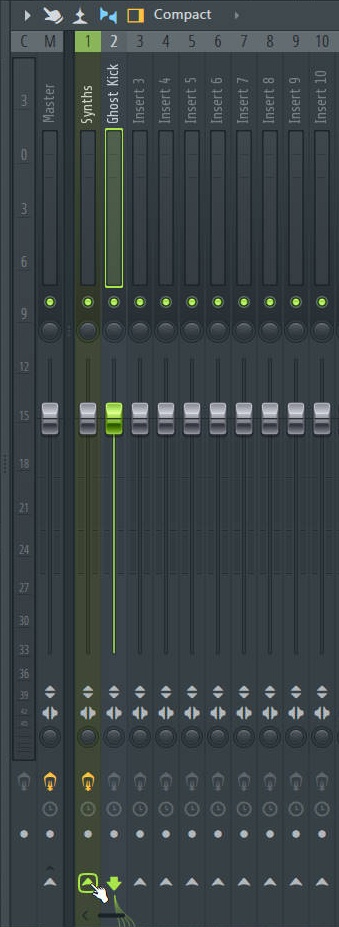
3. Enable send from Ghost Kick to Synth channel
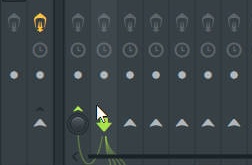
4. Turn the amount of send to zero
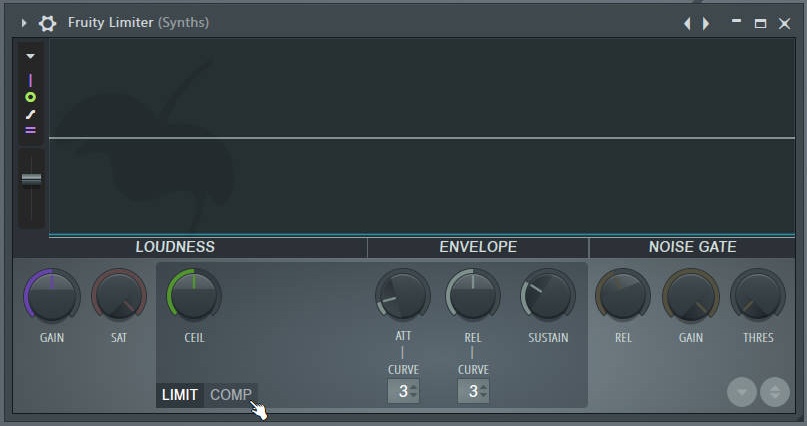
5. Add Fruity Limiter on the Synth channel
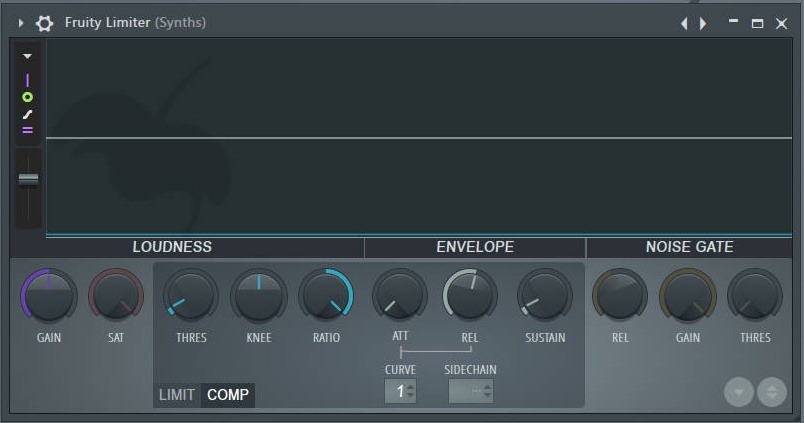
6. Click “COMP” and modify the settings like above
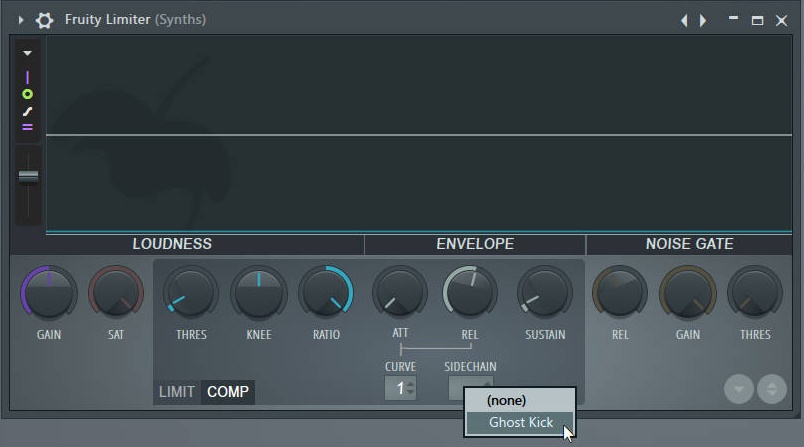
7. Right click “SIDECHAIN” box and select “Ghost Kick”

8. Fill the Ghost Kick pattern by filling each 4 steps
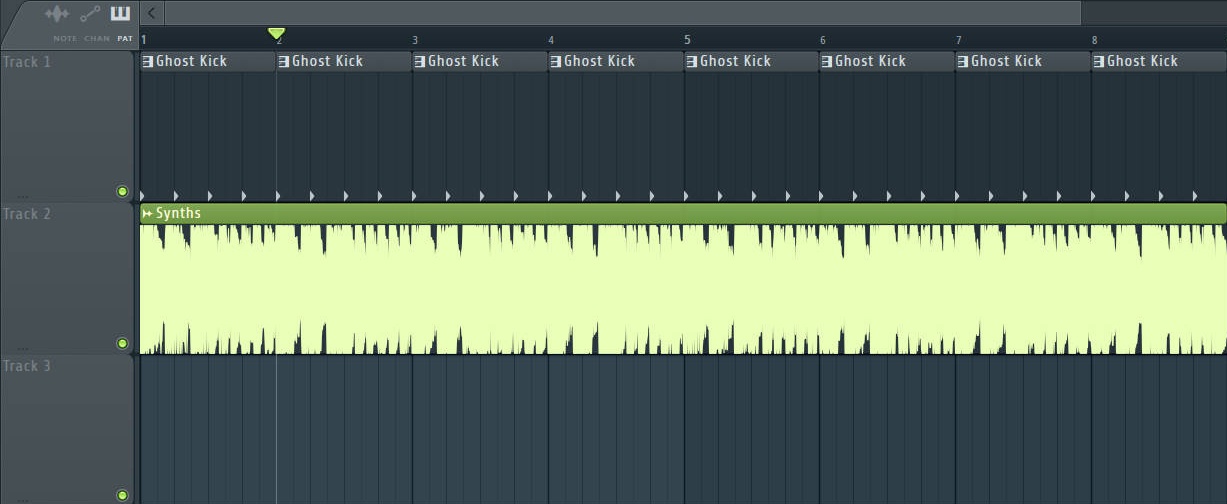
9. Place the pattern over the Synth loop
This is the classic way of sidechain compression. I like this method because of its flexibility. I tend to use this method when I am not doing the Four on the Floor sidechain compression.
These are the top 3 methods of doing the sidechain compression for me in FL Studio.
What’s yours?
Share it in the comment section below.
Have a nice day.
Your W. A. Production team


_Cropped.png?width=1600&name=02%20(2)_Cropped.png)


Your Comments :