


Every time when a dance music has its transition from a drop to its breakdown, you’ll hear an impact sound effect used for the transition.
It is often used to create an emotional swing for the listeners.
Today, I am going to teach you the fundamentals to create an impact sound effect.
Surprisingly, it’s fairly easy to make.
Let’s start.
Basic Elements:
- Kick
- Clap
- Noise Sweep Down
In case you do not know how to create a white noise sweep, you can check it out here.
Breakdown:
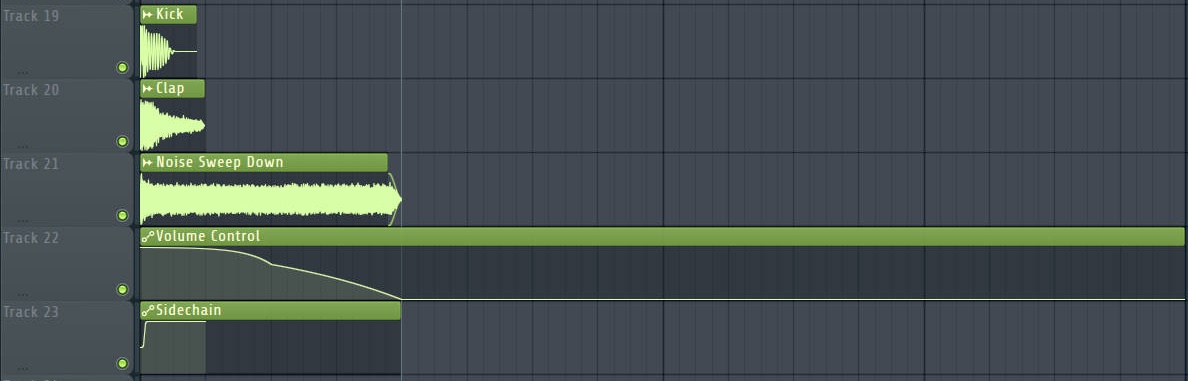
1. Set Up
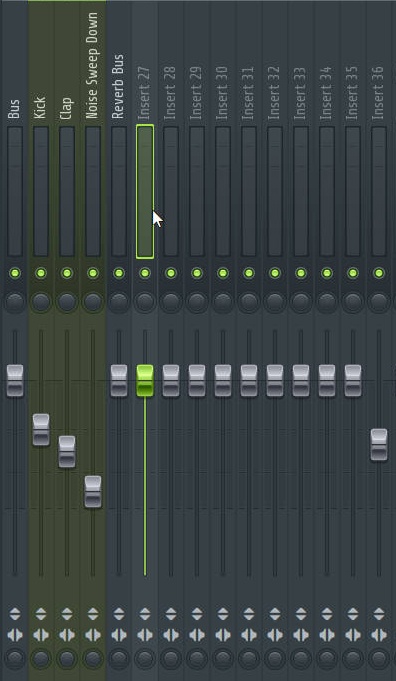
First, you route all the three elements to 3 different mixer tracks. Then, you create a send channel for the delay/reverb effect and a bus to group everything up.
2. The Send Buss
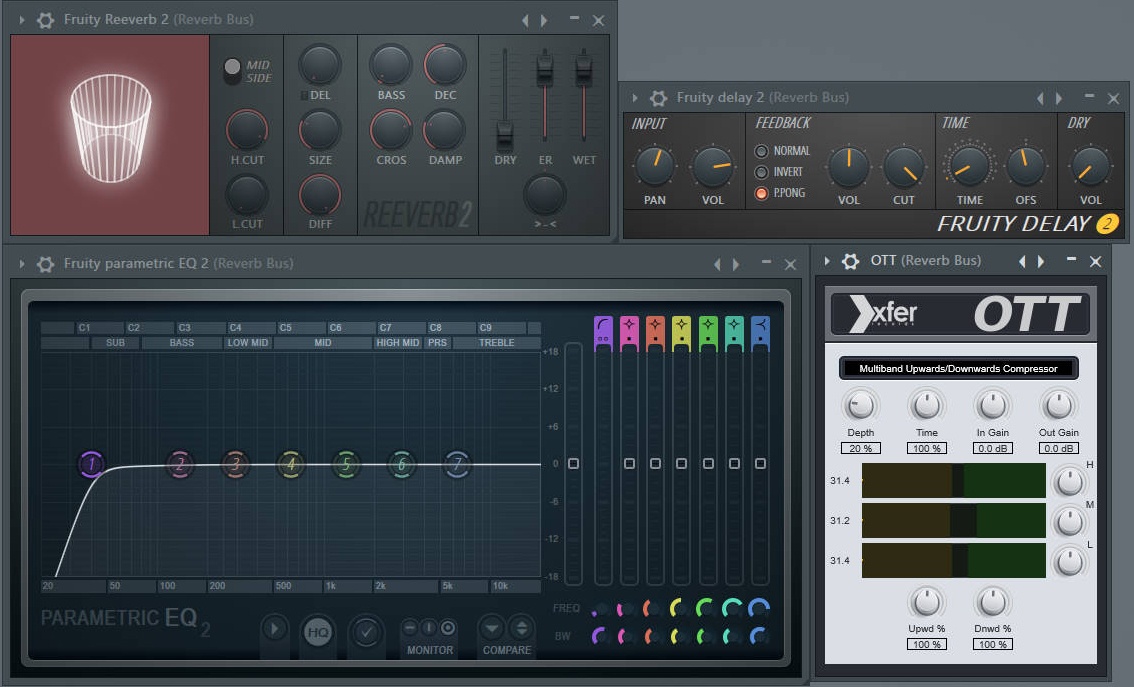
Delay Effect
You want a fast ping-pong delay effect here or you can use the setting above as a reference. Just tweak the delay setting until it fits your taste.
Reverb Effect
Just like the delay effect, just tweak until you are satisfied with it. You can use the settings above as reference.
EQ
Just to cut off unwanted frequency.
OTT
Just feel the magic that OTT does to your delay/reverb.
3. Noise Sweep
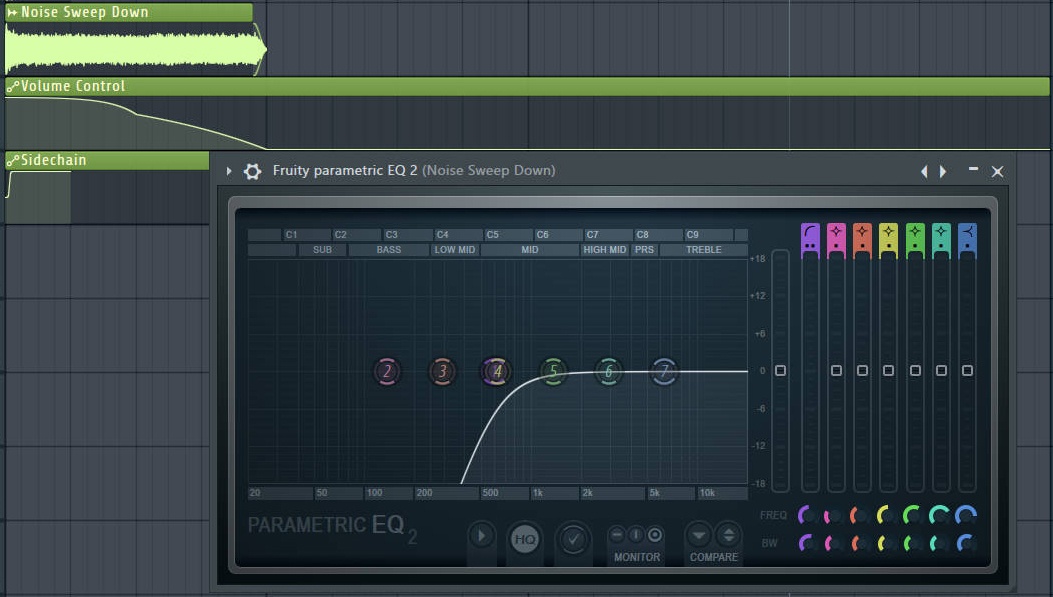
I have an extreme high cut for the noise sweep because I don’t like its low frequency. Then I apply a sidechain automation (I don’t want it to clash with my kick and clap) and a volume automation to it.
4. Kick and Clap
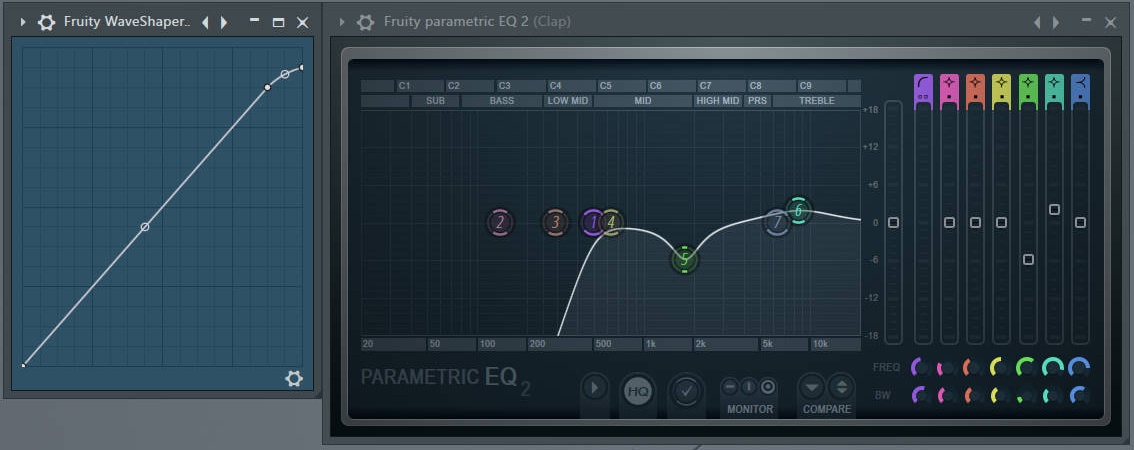
I just apply an EQ for the clap to remove the low frequency and a soft clipper to control its peak. I am satisfied with the kick so I do not apply any effect to the kick.
5. The Group Buss
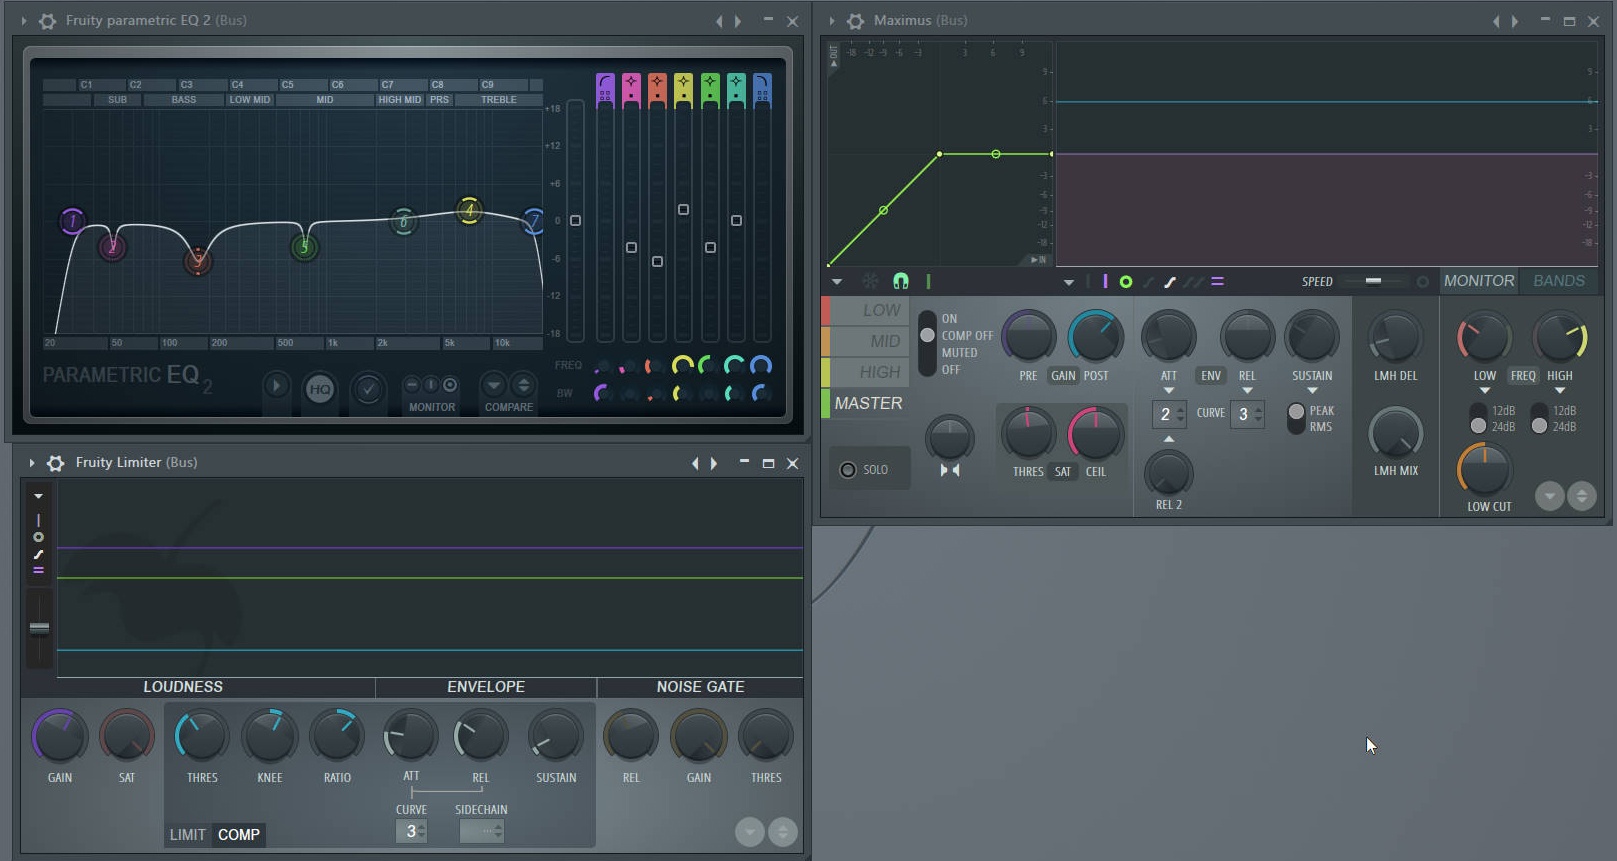
Fruity Limiter (Compression)
I use the Fruity Limiter as a compressor to control the dynamic range of the impact.
EQ
I just cut frequencies that I don’t like and boost certain area to strengthen the sound.
Maximus (Imager and Limiter)
I make sure the low end is in mono. Then I just increase the loudness of the impact using the limiter.
6. Final Edit
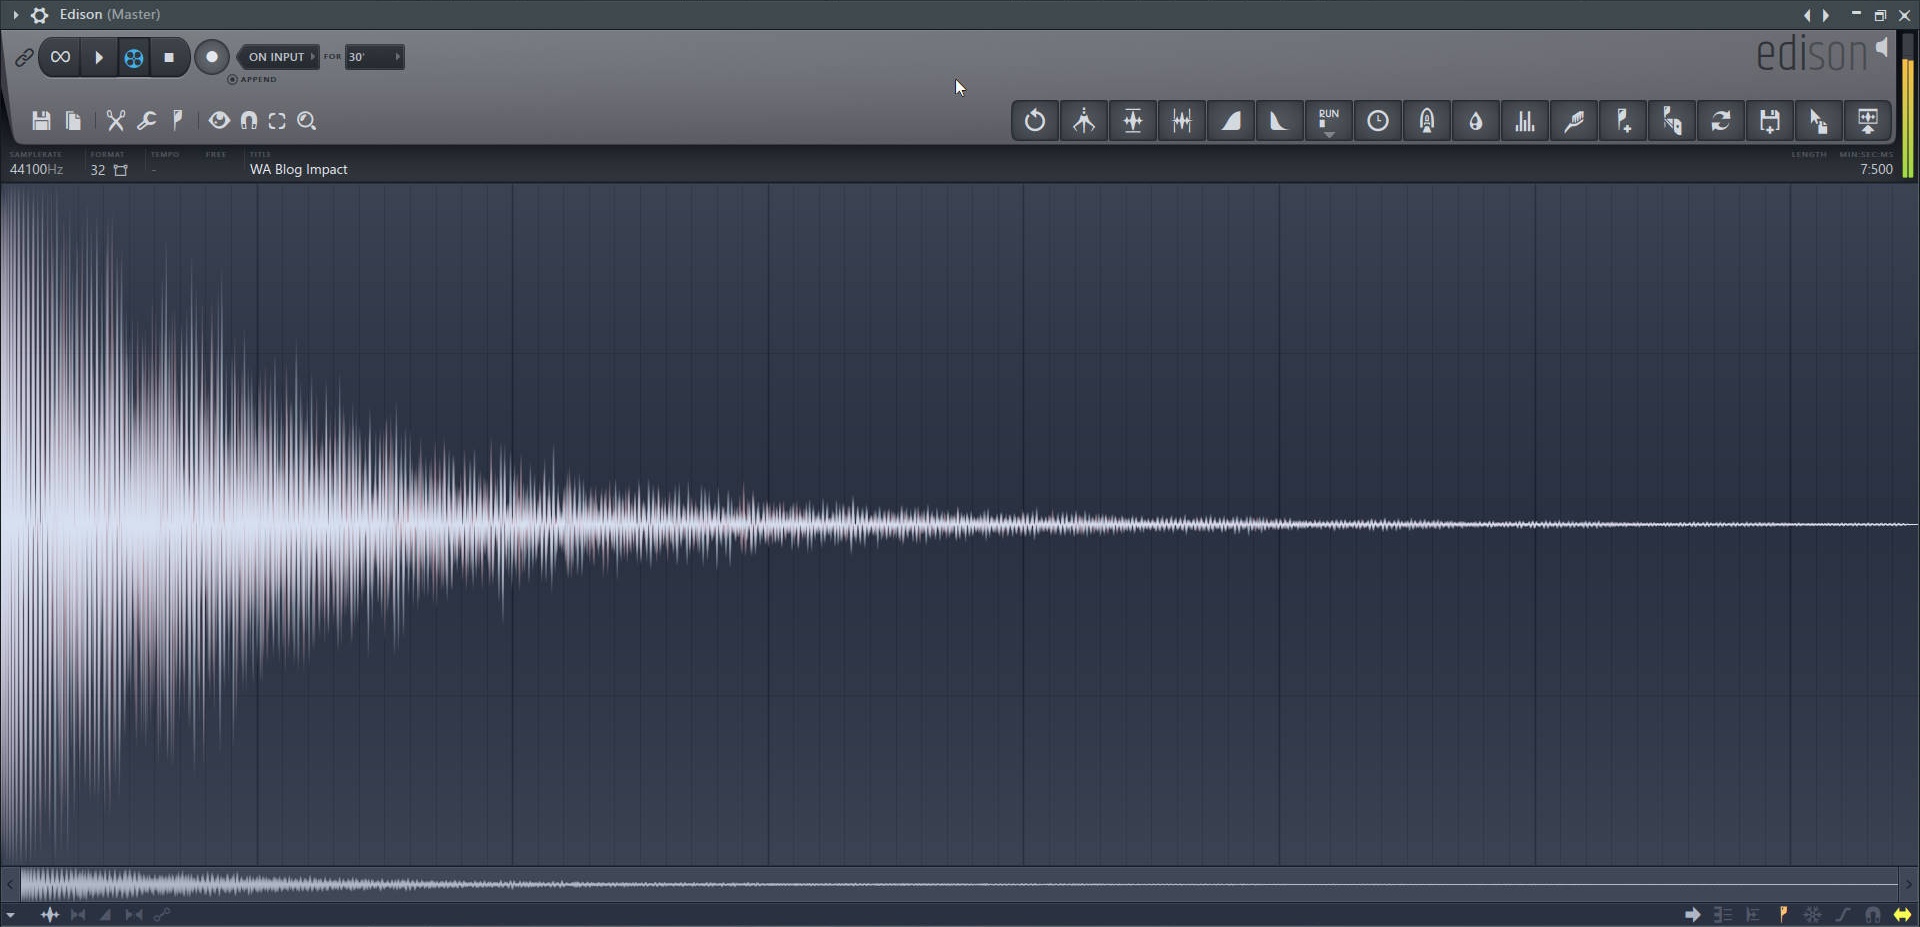
If you often read our blog, you’ll know that I love to use Edison for my final edit. Edison is such an underrated tool.
There you go.
An impact of your own ready to be used for your next track.
Comment below and let us know what you guys want next in the next blog post.
Have a great time producing.
If you want to grab the impact which I made for this blog, you can get it by clicking HERE
Thank you.
W. A. Production team
_Cropped.png?width=1600&name=02%20(2)_Cropped.png)


Your Comments :