


Dubstep this, ambient that. It's all good and great. However, what about those of us who enjoy, not only listening to but creating industrial music?
There are a small handful of forum topics when searching the internet, but they rarely turn up any actual results. So I am going to fill you in on how to get a good industrial synth sound using FLStudio.
As a point of reference so you understand some of the lingo below and know why these settings are the way they are I’ve included a cheat sheet below.
A - D - S - R
What are they and what do they mean to me?
A.D.S.R. is the most common type of envelope. It is typically applied to simulate volume. Each one plays a crucial role in the sound you end up with.
- A = Attack. The time it takes for the note to reach its max.
- D = Decay. How long it takes to go from the max level to the sustain level.
- S = Sustain. How long the note is held.
- R = Release. The time it takes for the note to go from sustain level to zero.
You can also see the manual in pdf format for a more in depth explanation of all the functions right HERE.
Educational moment over, now let's make some noise.
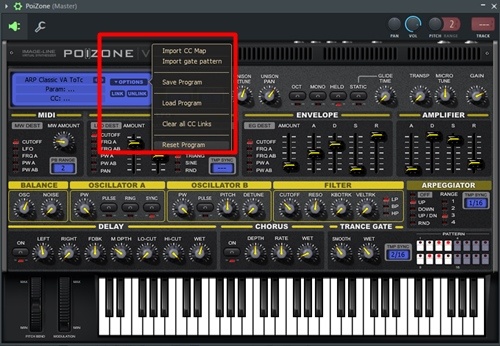
Begin by opening Poizone.. The first thing we want to do is put everything back to zero to allow you a fresh start.
You can do this by selecting "Options", at the bottom of the list select "Reset". If reset isn't an option, you are likely all ready where you want to be. You can verify this by looking at the window in Poizone and it will have no information or say "no name".
Now lets get to the settings. I will be working from the top, from left to right on down.
Unison Settings
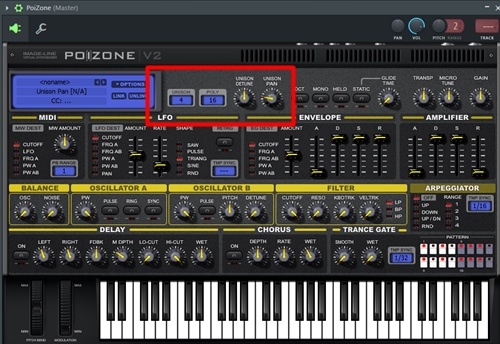
- Set Unison to 4.
- Unison detune to 50%
- Unison Pan at 20%
LFO Settings
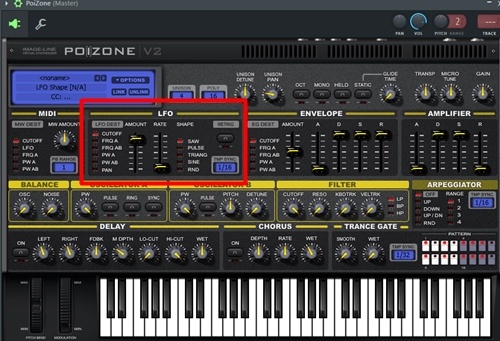
- Select - Cutoff
- Amount 70%
- Rate 0%
- Shape - set to Saw
- TMP SYNC 1/16

ENVELOPE Settings
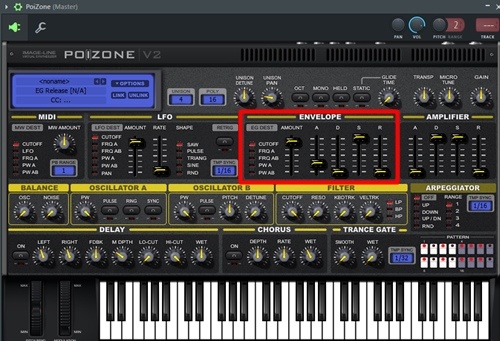
- Select - Cutoff
- Amount 75%
- A (Attack) 200ms
- D (Decay) 0
- S (Sustain) 100%
- R (Release) 0
AMP Settings
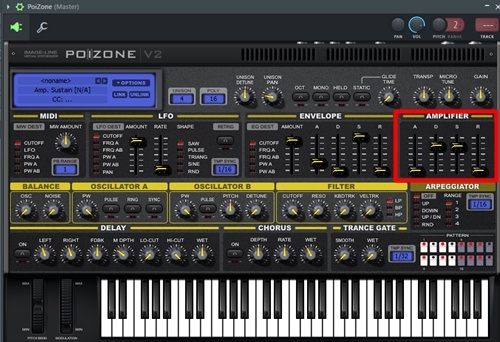
- A (Attack) 0
- D (Decay) 5220ms
- S (Sustain) 70%
- R (Release) 0
- Side Note - If you want more of a bouncing style arpeggio try the following:
- D (Decay) 600ms
- S (Sustain) 70%
BALANCE Settings
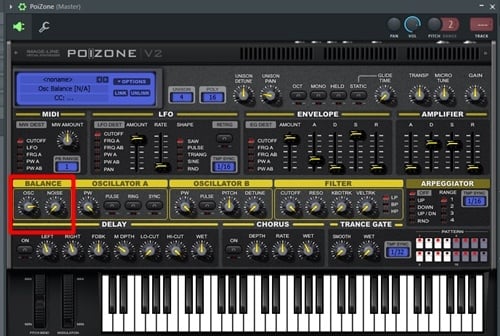
- Osc 80
- Noise 0
OSCILATOR A
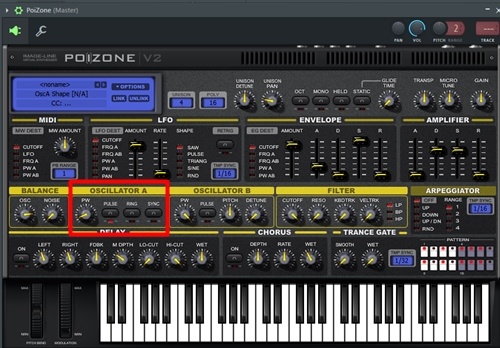
- PW = 0cnt
- Pulse Button on
OSCILATOR B
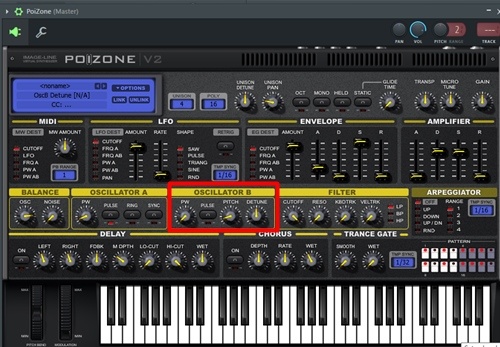
- PW 0cnt
- Pitch -20sem
- Detune 25cnt
FILTER Settings
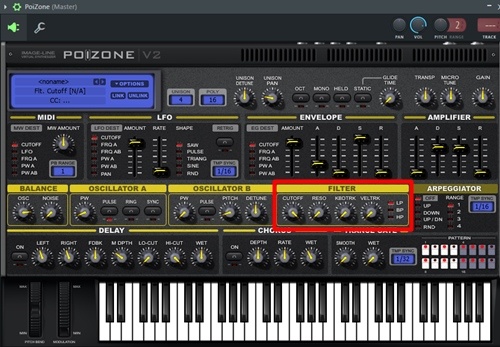
- cutoff 100
- reso 0
- kdb 0
- veltrk 0
- LP = on
Arpeggiator Settings
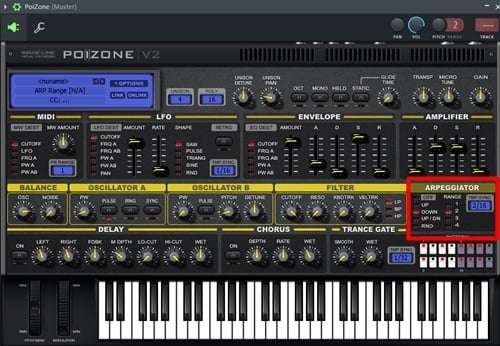
- Down
- Range - 2
- tmpsync - 2/16
Chorus
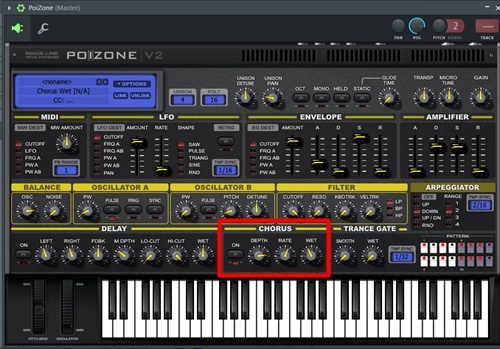
- Select - ON
- Depth 80%
- Rate 3HZ
- Wet 40%
Last, go the upper left corner arrow, select the arrow, in the drop down menu select "save preset as" , give it a clever name, and save it for reference.

The methods to my madness are not an exact science. However now that you understand some of the functions and have a saved preset, go experiment. Select different functions and see how they effect the sound.
Your W. A. Production team
_Cropped.png?width=1600&name=02%20(2)_Cropped.png)


Your Comments :